Get help making a backup in iTunes
When you're backing up your iPhone, iPad, or iPod touch in iTunes, you might see an alert message. For example, a message might say there’s not enough free space, or that a session failed or couldn't be started.
When you're backing up your iPhone, iPad, or iPod touch in iTunes, you might see an alert message. For example, a message might say there’s not enough free space, or that a session failed or couldn't be started.
You might see duplicate calendars if you have more than one method to keep iCloud calendars up to date across your devices. Apple provides two methods: iTunes and iCloud. It's possible to use both methods if you’re using iTunes 10, or iTunes 11.2 or later and OS X Mavericks v10.9.3 or later.
If you have iTunes 10 or iTunes 11.2 or later, check to see if iTunes is syncing calendars:
Then check to see if iCloud is also updating your calendars:
If iTunes and iCloud are both set to keep calendars up to date, consider turning off calendar syncing in iTunes. Then, only iCloud will update your calendars.
If you want to keep using iTunes to update your calendars, turn off iCloud Calendar:
iOS
OS X
Windows
Follow the steps in the next section to hide or delete duplicate calendars. Your old calendars and events will still be duplicated, so you need to either hide or delete them.
If you back up your iPhone, iPad, or iPod touch, you’ll have a copy of your information to use if your device is ever replaced, lost, or damaged. Backups let you transfer data from your last device to your new one.
After you update iTunes, you might notice that your music, videos, and other content are missing. These steps can help.
This file is a database of the songs in your library and the playlists you've created. Some song-specific data is saved in this file. If you delete the file, iTunes creates a new, empty copy when you open the application, but any playlists, song ratings, comments, or other information is lost. The iTunes Library file is only used by iTunes, and is the only one backed up by Time Machine on OS X.
For iTunes for Mac versions 10.4 and earlier, the library file name was iTunes Library with no file extention.
New versions of iTunes sometimes include enhancements to the iTunes library. When you open the new version of iTunes, iTunes updates your existing library to the new format and places a copy of the old library in the Previous Libraries folder. After iTunes updates successfully to the latest version, you can delete the older iTunes Library files.
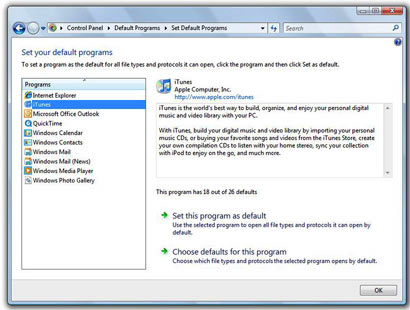
To make iTunes your default media player, use the Default Programs control panel:

You can have iTunes notify you when it's not the default media player:
When the notification is on, you'll see this message: "iTunes has detected that it is not the default player for audio files. Would you like to go to the Default Programs control panel to fix this?"
To remove this notification, deselect the "Warn me" option in iTunes preferences.
The first time you open the Mac App Store in OS X Yosemite, it checks for installed versions of these apps that came with your computer, or that you installed from a disc:
When these apps are found, newer versions are listed in the Updates pane of the Mac App Store. After you sign in to the Mac App Store with your Apple ID, these apps are added to your account. You can then update to the newer versions of these apps available for your Mac.
If the list of updates doesn't display all of the app updates you expect, first install any updates that are listed, including OS X updates. Then check the Updates pane again to see if a newer version of the app you're looking for appears.
If you still don't see app updates listed, check your Spotlight preferences. From the menu bar at the top of your computer screen, choose > System Preferences > Spotlight > Privacy. If your startup disk or Applications folder are in this list, the updated apps might not be available in the Updates pane.
If the apps installed on your computer are older than the versions listed above, you can purchase current versions of these apps from the Mac App Store.
iCloud status will help you to figure out if a song was purchased from the iTunes Store, matched, uploaded, or is ineligible for upload. Items might not be eligible for upload if:
To see the iCloud status of your songs:
If a song contains DRM and is no longer available to buy from the iTunes Store, the song is uploaded to iCloud and made available for download in protected DRM format. You will be required to authorize your computer or device for playback.
A song will not be uploaded to iCloud if the song contains DRM, was purchased using a different Apple ID, and could not be matched.
When you subscribe to or turn-on iTunes Match, your iOS device or computer will be associated to the Apple ID being used for iTunes Match. Learn more about how to associate a device or computer to an Apple ID.
You can manage your password preferences for the iTunes Store, App Store, and iBooks Store from your iOS device.
You have two password options to choose from with paid and in-app purchases:
If you don't want to enter your password when downloading free songs or apps, choose Never. You can't completely turn off password protection for paid items.
If you have Touch ID turned on for iTunes Store and App Store purchases on your iOS device, you don't need to set your password preferences. Also, if you turn on Touch ID after you set your preferences, Touch ID will override your preferences.
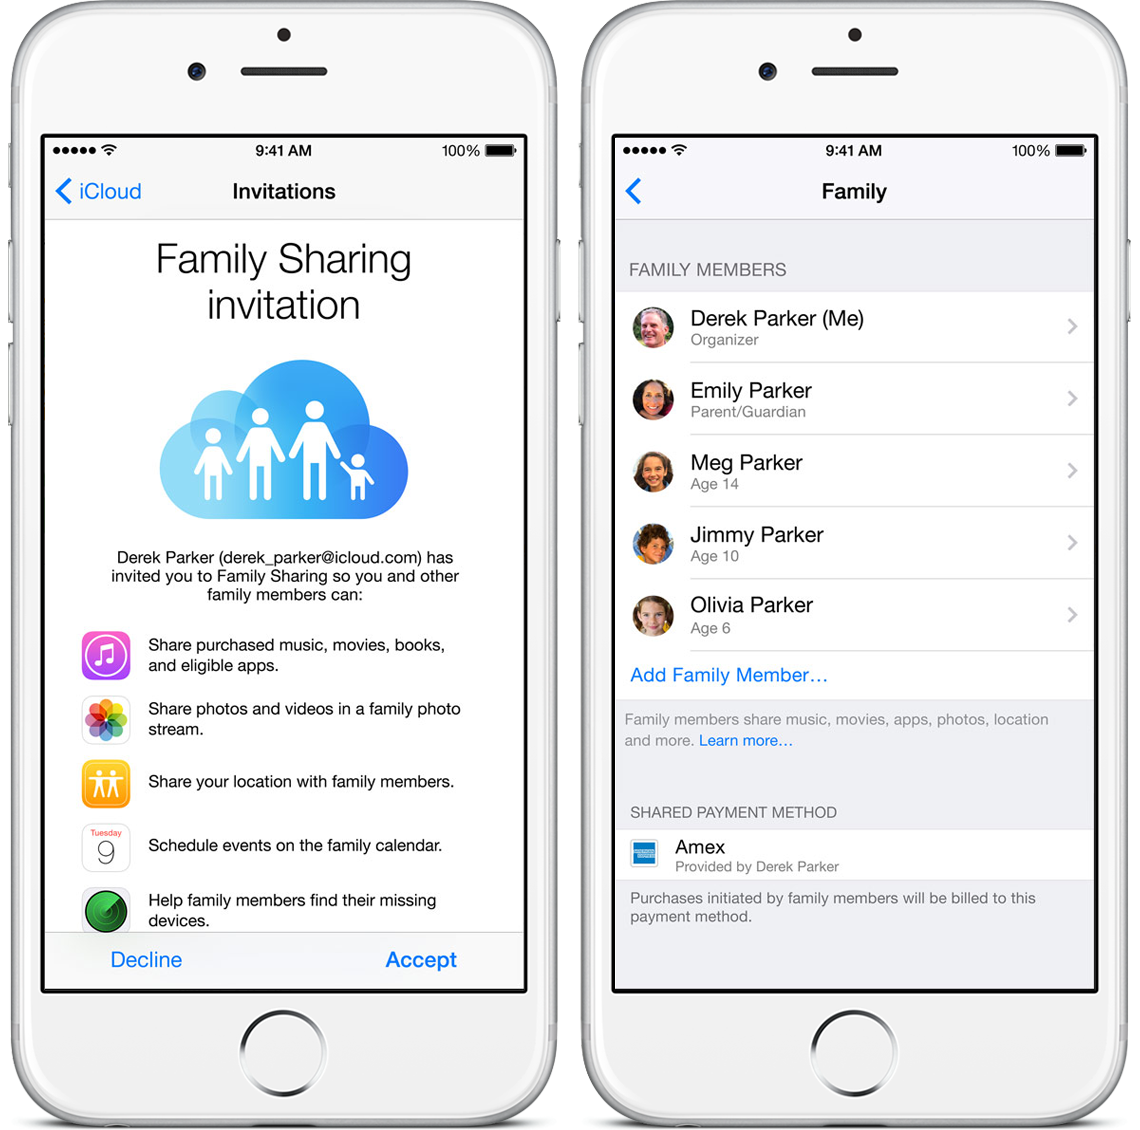
Family Sharing makes it easy for up to six people in your family to share each other’s iTunes, iBooks, and App Store purchases without sharing accounts. Pay for family purchases with the same credit card and approve kids’ spending right from a parent’s device. And share photos, a family calendar, and more to help keep everyone connected.
You can use Family Sharing on your iPhone, iPad, or iPod touch with iOS 8, your Mac with OS X Yosemite and iTunes 12, or your PC with iCloud for Windows. To get started, one adult in your household—the family organizer—sets up Family Sharing, invites up to five additional family members, and agrees to pay for any iTunes, iBooks, and App Store purchases they initiate while part of the family group. Once family members join, the features of Family Sharing are set up on everyone’s devices automatically.