Knowledge base

iOS: Unknown error containing '0xE' when connecting to a Windows PC

Posted in Apple iTunes

Information about products not manufactured by Apple, or independent websites not controlled or tested by Apple, is provided without recommendation or endorsement. Apple assumes no responsibility with regard to the selection, performance, or use of third-party websites or products. Apple makes no representations regarding third-party website accuracy or reliability. Risks are inherent in the use of the Internet. Contact the vendor for additional information.

Read Full Article

iTunes for Windows: "Unable to load data class" or "Unable to load provider data" sync services alert

Posted in Apple iTunes

2. Reset Sync History

Resetting your Sync History is a simple step which may resolve some syncing issues. If this works, iTunes will prompt to Merge or Replace the information on your device when you next attempt to sync. To reset your Sync History:

  1. Disconnect your device.
  2. Open iTunes.
  3. From the Edit menu, choose Preferences.
  4. Click the Devices tab.
  5. Click the Reset Sync History button, and then reconnect your device.

If this resolves the issue, and you know all of your contacts, calendars, bookmarks and notes are on your computer:

  1. Reset the Sync History again using the steps above.
  2. Select the device in iTunes and click the Info tab.
  3. Scroll down to the Advanced section, and under "Replace information on this iPhone/iPad/iPod touch" select Contacts or Calendars.
  4. Click Apply.

If the issue persists, and you know all your contacts, calendars, bookmarks and notes are on your iPhone, iPad, or iPod touch:

  1. Remove all of the contact and calendar information from Outlook.
  2. Select the device in iTunes and click the Info tab.
  3. Scroll down to the Advanced section, and under "Replace information on this iPhone/iPad/iPod touch" make sure Contacts and Calendars are not selected.
  4. Click Apply.

Read Full Article
GarageBand for iOS: Backing up your songs

Posted in Apple iTunes

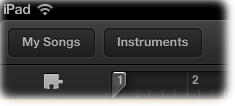
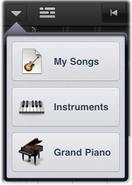
  1. Tap the My Songs button.
  2. iPad: iPhone and iPod touch:
  3. Tap the Export Song button:  
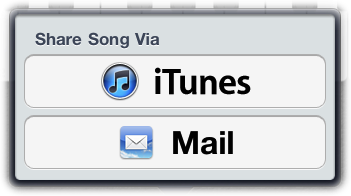
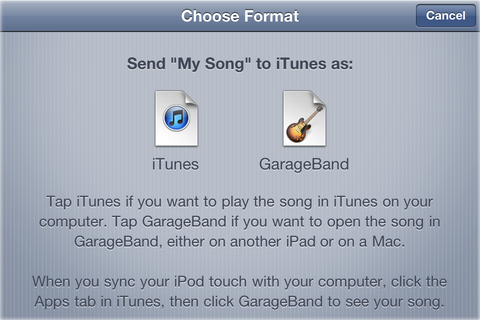
  4. Tap the "iTunes" button.
  5. iPad: iPhone and iPod touch:
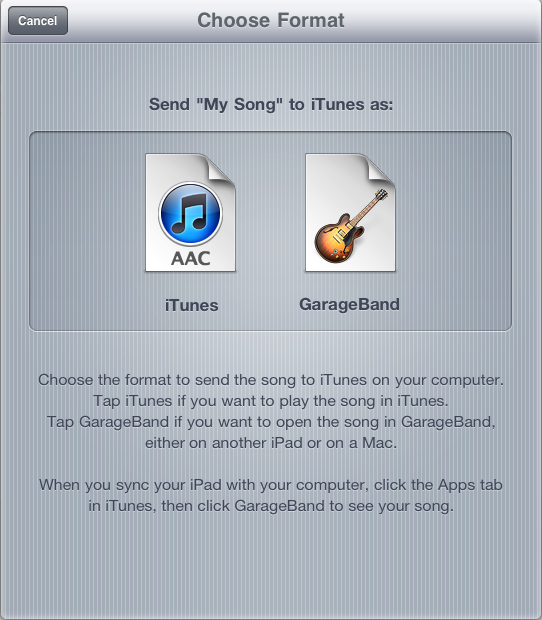
  6. Tap GarageBand.
  7. iPad: iPhone and iPod touch:

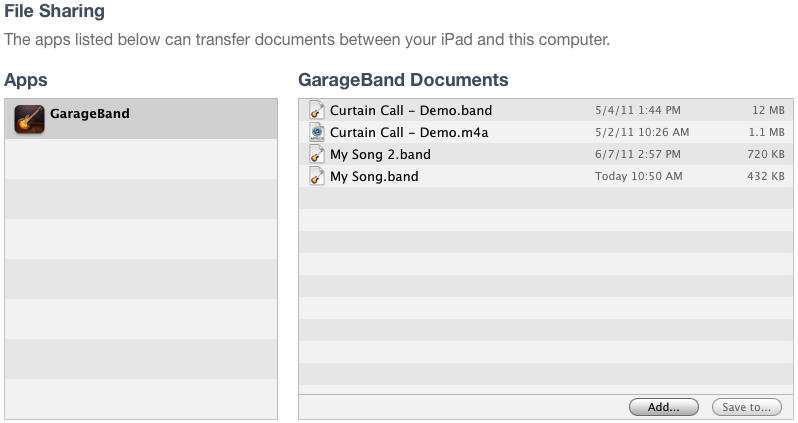
    The next time you sync your mobile device, the exported song appears in the GarageBand Documents list under File Sharing in iTunes:


    Note: Send the song as a GarageBand song if you want to open it with GarageBand on a mobile device or a Mac. For information on sending songs to iTunes for Windows, seethis article.

  8. You can now do one of the following to access the song outside of iTunes:
    • Drag the song from the GarageBand Documents list to the Finder.
    • Click "Save to," navigate to the location where you want to save the song, then click Save.

Read Full Article

Apple security updates (2011, 2012)

Posted in Apple iTunes

Security updates are usually incorporated into later Software Updates

Security updates released for Mac OS X are usually incorporated into the next OS X Software Update.

Security updates may also be available for software released independently from OS X. Software Updates are packaged in a manner to keep systems secure. Security updates are only offered to systems that need the update, and not to later versions that have incorporated the Security Update. For more information, see the "Some, but not all, updates are displayed" section of this document

Read Full Article

Troubleshooting issues with your UnionPay card

Posted in Apple iTunes

When you add UnionPay as a payment method in the App Store, you are required to provide the mobile phone number your card's issuing bank has on file for you.

If you experience issues adding your UnionPay card, try contacting your bank:

  1. To add or update your mobile number associated with the UnionPay card.
  2. To confirm that the card number is enabled for online purchases.

Some cards do not have mobile numbers associated with them. If this is the case with your card, contact your bank to update or replace it.

Read Full Article

Turn off compatibility mode in iTunes for Windows

Posted in Apple iTunes

Information about products not manufactured by Apple, or independent websites not controlled or tested by Apple, is provided without recommendation or endorsement. Apple assumes no responsibility with regard to the selection, performance, or use of third-party websites or products. Apple makes no representations regarding third-party website accuracy or reliability. Risks are inherent in the use of the Internet. Contact the vendor for additional information.

Read Full Article

If a missing folder or incorrect permissions prevents iTunes authorization

Posted in Apple iTunes

  • This next step involves modifying permission settings by entering commands in the Terminal application. Users unfamiliar with Terminal and UNIX-like environments should proceed with caution. The entry of incorrect commands might result in data loss or unusable system software. Improper alteration of permissions can result in reduced system security or exposure of private data. This option requires a non-blank admin password.

    If you're using Mac OS X 10.6 or later, type the command below into the Terminal window:

    sudo chmod -R 1777 /Users/Shared

    If you're using Mac OS X 10.5.8 and earlier, type the command below into the Terminal window:

    sudo chmod -R 777 /Users/Shared

  • Read Full Article

    Fix unexpected quits or launch issues in iTunes for Windows

    Posted in Apple iTunes

    User-specific issues

    If the issue only happens in one particular user account:

    Create a new iTunes library to see if the issue occurs in a new library. If using a new iTunes library resolves the issue, recreate your old library in your new one.
    To change back to your original library, close iTunes, and then hold down the Shift key on your keyboard while you reopen the program.

    If the issue persists:

    Check for issues with content files. Audio files can sometimes cause iTunes to quit unexpectedly or stop responding when the program is analyzing gapless playback information. To determine which file might be causing the issue, follow the steps below:

    1. Quit iTunes.
    2. Navigate to the iTunes folder:
      Windows Vista: C:\users\username\Music\iTunes
      Windows 7 and Windows 8: C:\users\username\My Music\iTunes
    3. Move the iTunes Library.itl file to your desktop.
    4. Open iTunes. Your library will be empty.
    5. Press the Control and B keys on your keyboard to open the iTunes menu bar. Choose File > Add Folder to Library.
    6. Navigate to the folder where your music is located:
      Windows Vista: C:\users\username\Music\iTunes\iTunes Media
      Windows 7 and Windows 8: C:\users\username\My Music\iTunes\iTunes Media
    7. Choose an artist, album, or song to add to the library and drag it into the iTunes window.
    8. Wait for iTunes to successfully add the item to your library and perform the gapless playback scan.
    9. If the scan is successful, continue adding songs to your library.
    10. If there's an issue with one of your files, your issue will reappear after you add it to the library. If it reappears, start over with these steps, being careful not to add the files that caused the issue.

    Read Full Article

    About the App Store

    Posted in Apple iTunes

    Browse and buy

    Tap App Store on your iPhone, iPad, or iPod Touch to browse and buy apps on your iOS device.

    To browse the App Store on your computer:

    • Open iTunes.
    • Click iTunes Store.
    • Click the More icon (three dots) in the upper-left hand corner of the window.
    • Click Apps.

    To buy apps, you need an Apple ID. If you don't have one, you can create an Apple ID in iTunes, or on your iPhone, iPad, or iPod touch. Learn what forms of payment you can use to buy apps and other content.

    Apps you download in the App Store appear in your iTunes library, but you won't be able to use them on your computer. Use iTunes to sync apps with your device.

    In-app purchases

    Some apps offer additional purchases that you make within a paid application. Learn more about in app purchases

    See previous purchases

    You can see all of the apps you've bought on your computer or on your iPhone, iPad, or iPod touch.

    On your computer

    1. Open iTunes.
    2. Go to the App Store.
    3. Under Quick Links, click Purchased.

    On your iPhone, iPad, or iPod Touch

    1. Tap App Store.
    2. Tap Updates.
    3. Tap Purchased.

    Read Full Article

    Find the serial number and other information for your iPhone, iPad, and iPod touch

    Posted in Apple iTunes

    iOS devices

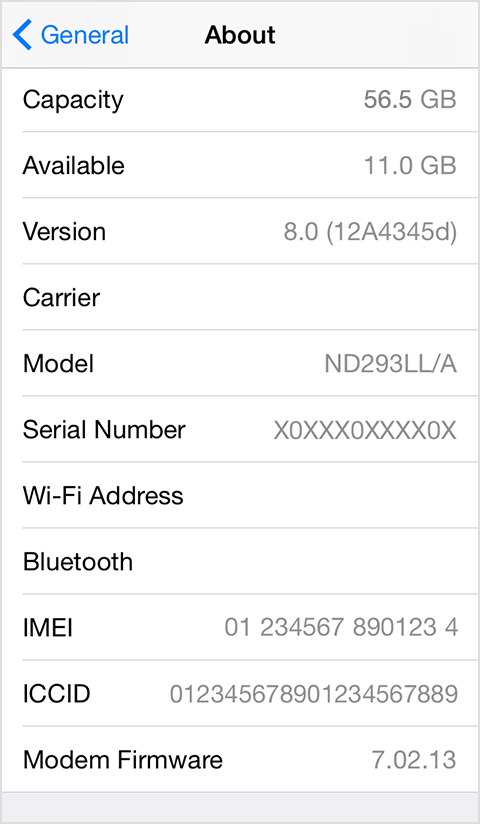
    On most iOS devices, you can tap Settings > General > About to see your device's serial number, IMEI/MEID, and ICCID. If you're using iOS 6 or later, you can tap and hold on the number to use the copy option, then paste this information into Apple registration or support forms.

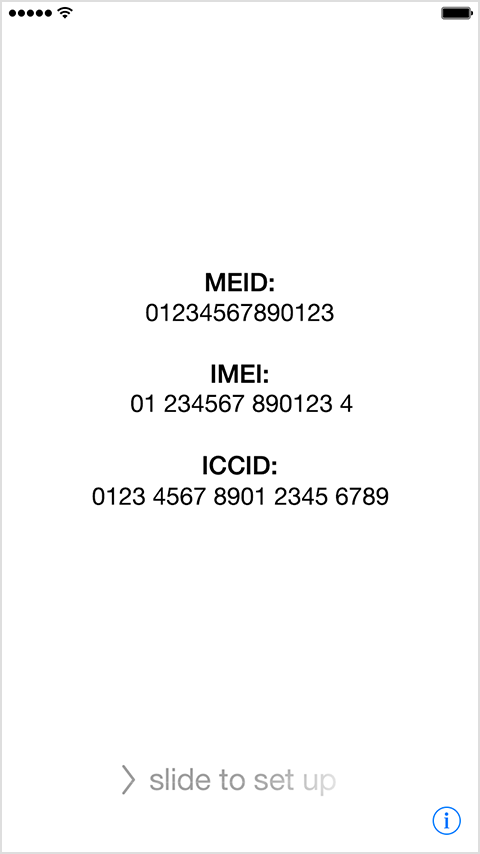
    If you haven't yet set up your device, you can find the IMEI and ICCID by tapping the Info icon   on the lower-right corner of the iOS setup assistant "Hello" screen.

    If you can't get to your About screen, use another option below based on the type of device you have. 

    iPad and iPod touch

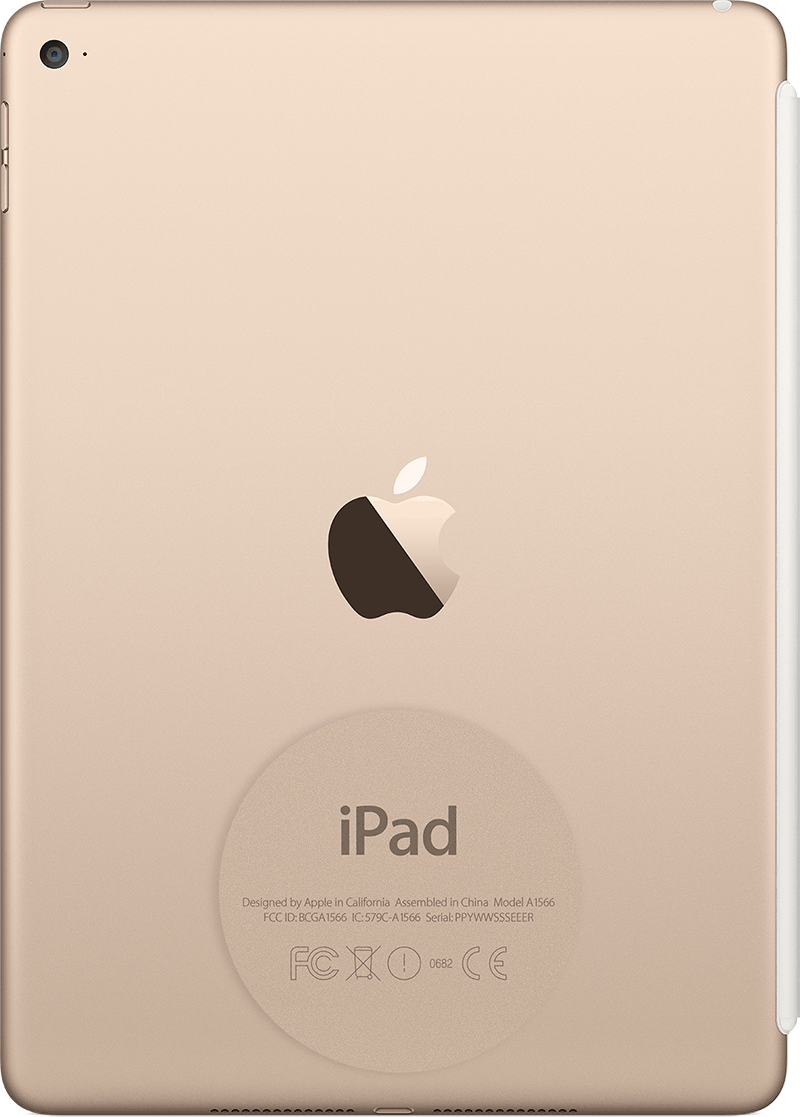
    Find the serial number for your iPad and iPod touch engraved on the back of your device, near the bottom. If you have an iPad (cellular model), you'll also see the IMEI.

    iPhone 5 and later, iPhone 5S, iPhone 5C, iPhone 6, and iPhone 6 Plus

    Find the IMEI for your iPhone engraved on the back of your device, near the bottom. The MEID number is the first 14 digits of the IMEI.

    Serial numbers are not engraved on the back of these devices.

    iPhone 3G, iPhone 3GS, iPhone 4 (GSM model), and iPhone 4s

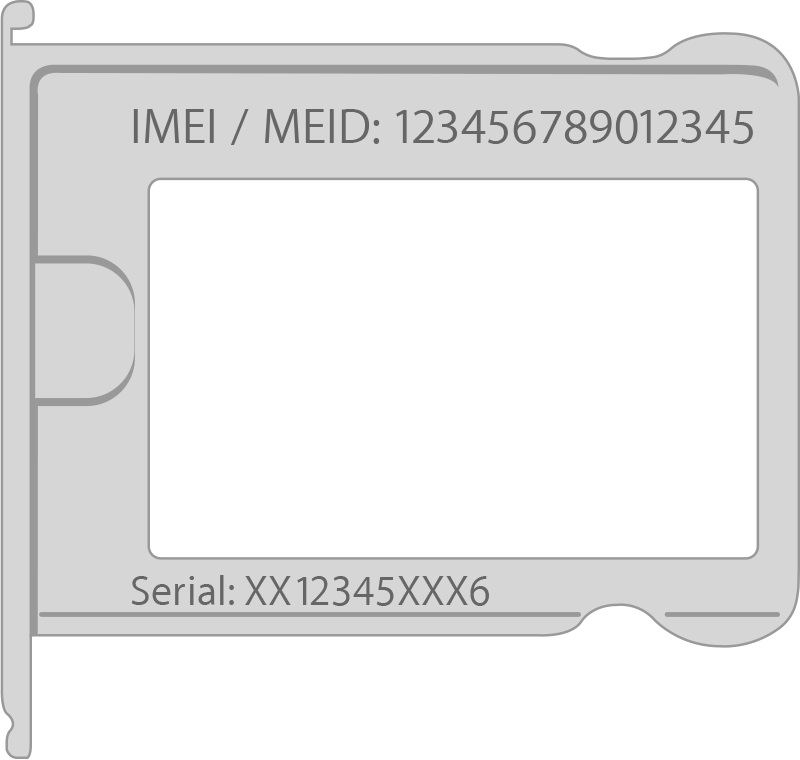
    Remove the SIM tray to find the serial number and the IMEI/MEID. (The MEID number is the first 14 digits of the IMEI.)

    Original iPhone

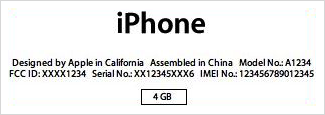
    You can find the serial number and IMEI for your iPhone engraved on the back of your device.

    Read Full Article