Knowledge base

About the security content of OS X Server v4.1

Posted in Apple Mac OS

For the protection of our customers, Apple does not disclose, discuss, or confirm security issues until a full investigation has occurred and any necessary patches or releases are available. To learn more about Apple Product Security, see the Apple Product Security website.

For information about the Apple Product Security PGP Key, see How to use the Apple Product Security PGP Key.

Where possible, CVE IDs are used to reference the vulnerabilities for further information.

To learn about other Security Updates, see Apple Security Updates.

    Read Full Article

    Boot Camp: Brightness controls no longer respond after updating to Windows 8.1

    Posted in Apple Mac OS

    Perform a Repair Install of the Boot Camp 5.1 drivers to resolve this issue.

    To perform the Repair Install, you'll need a USB flash drive that contains the proper Boot Camp 5.1 drivers for your system. If you no longer have the media you used to install the Boot Camp Suport Drivers, you can create another copy using the Boot Camp Assistant located in the Utilities folder. Use the Assistant to download the appropriate drivers to a USB flash drive, then quit the assistant. You can also download the drivers from the Apple Support Website and copy them to a USB flash drive that is formatted for Windows. 

    After obtaining the drivers on USB media, use these steps to perform the Repair Install:

    1. Start your Mac in Windows 8.1.
    2. Insert the flash drive or other USB media that contains the drivers you downloaded when you installed Windows 8.1.
    3. Switch to the Desktop and open File Explorer.
    4. Double click the flash drive icon to open it.
    5. Locate the Boot Camp folder and open it.
    6. Locate and open Setup.exe in this folder.
    7. At the User Account Control security prompt, click Yes.
    8. A Repair Boot Camp services window appears. Click on Repair.
    9. The Repair replaces all the drivers with ones that you downloaded to your USB media.
    10. A Boot Camp installer completed window appears. Click Finish to close the installer.
    11. At the restart prompt, click Yes to restart your Mac.

    Read Full Article

    OS X: Backing up and restoring Reminders in Mountain Lion

    Posted in Apple Mac OS

    You can save a copy of your Reminders in Mountain Lion in case you later want to restore them to a previous state.

    Create a backup file

    You can use Time Machine to back up your Reminders and other important data. You can also use the following steps to create a separate, manual backup of your Reminders.

    1. In Reminders, choose File > Export.
    2. Name the backup file and choose where you want to save it (such as your desktop or Documents folder), then click Export. This makes an .ICS file.

    Restore your reminders from a backup file

    Use these steps to restore your Reminders from a manual backup you created previously. 

    Important: When you import a backup file, any changes you made in Reminders since the backup was made will be lost.

    1. In Reminders, choose File > Import.
    2. Locate your Reminders backup file (.ICS), then click Import.
       

    If you use Time Machine and you manually saved a backup copy of your Reminders somewhere on your computer, but later deleted the file, you can use Time Machine to recover it.

    Important: When you import a backup file, any changes you made in Reminders since the backup was made will be lost.

    1. Open the location where you placed your Reminders file.
      For example, if the file was located in your Documents folder, open the Documents folder. If the file was located on your desktop, you don’t need to open anything.
    2. Connect your Time Machine volume if it isn't, then enter Time Machine.
    3. Using the arrows and the timeline along the right edge of your screen, browse through the backups until you find the Reminders backup file.
    4. Select the backed up file, and then click Restore. The restored file is returned to its original location.
    5. In Reminders, choose File > Import.
    6. Locate the restored Reminder file, and then click Import.
    Last Modified: Feb 13, 2014
    Helpful?
    Yes
    No
    One Moment Please
    Thanks for your feedback.
    Email this article
    Print this page
    • Last Modified: Feb 13, 2014
    • Article: HT5469
    • Views:

      38612
    • Rating:
      • 56.0

      (188 Responses)

    Additional Product Support Information

    About the security content of Boot Camp 5.1

    Posted in Apple Mac OS

    This document describes the security content of Boot Camp 5.1.

    This update can be downloaded and installed using Software Update, or from Apple Downloads.

    For the protection of our customers, Apple does not disclose, discuss, or confirm security issues until a full investigation has occurred and any necessary patches or releases are available. To learn more about Apple Product Security, see the Apple Product Security website.

    For information about the Apple Product Security PGP Key, see "How to use the Apple Product Security PGP Key."

    Where possible, CVE IDs are used to reference the vulnerabilities for further information.

    To learn about other Security Updates, see "Apple Security Updates".

    Boot Camp 5.1

    • Boot Camp

      Available for: Macs running Boot Camp 5

      Impact: Loading a malformed executable file may cause memory corruption in the kernel

      Description: A bounds checking issue existed in the AppleMNT.sys driver's parsing of Portable Executable files. If a Portable Executable file with a malformed header is loaded, this could cause a Boot Camp driver to corrupt kernel memory. The issue was addressed through improved bounds checking.

      CVE-ID

      CVE-2014-1253 : MJ0011 of 360 Security Center

    Important: Mention of third-party websites and products is for informational purposes only and constitutes neither an endorsement nor a recommendation. Apple assumes no responsibility with regard to the selection, performance or use of information or products found at third-party websites. Apple provides this only as a convenience to our users. Apple has not tested the information found on these sites and makes no representations regarding its accuracy or reliability. There are risks inherent in the use of any information or products found on the Internet, and Apple assumes no responsibility in this regard. Please understand that a third-party site is independent from Apple and that Apple has no control over the content on that website. Please contact the vendor for additional information.
    Last Modified: Feb 12, 2014
    Helpful?
    Yes
    No
    One Moment Please
    Thanks for your feedback.
    Email this article
    Print this page
    • Last Modified: Feb 12, 2014
    • Article: HT6126
    • Views:

      0

      Additional Product Support Information

      Mac Basics: Printing in OS X

      Posted in Apple Mac OS

      Learn about adding a printer, and printing in OS X Mavericks, and Mountain Lion.

      Adding A Printer

      printer icon

      For most USB printers, all you have to do is connect the printer to your Mac. OS X automatically sees the printer, and downloads any drivers if necessary. Then, you're ready to print. You can also quickly add a nearby AirPrint or network printer.  If you want to make sure your printer is compatible with OS X, check this list.

      Before you begin

      Before adding a printer to your Mac, check the following:

      • Choose Software Update from the Apple menu to make sure OS X is up to date. This also updates the database of available printer software provided to Apple by printer vendors. If this is not done, you may see messaging that software is not available.
      • Make sure the printer is powered on, has paper, and doesn't have any issues such as a paper jam, low ink, or alerts displayed on its control panel. If the printer has an issue that can't be cleared, contact the printer vendor for guidance.
      • If your printer connects wirelessly using Wi-Fi, make sure it is properly connected to the same Wi-Fi network as your computer. The printer may have to be connected to the Mac initially using USB. See Overview on how to connect a Wi-Fi printer to your Wi-Fi network for more information.
      • Adding, managing, or removing print queues and software may require an administrator account name and password. Apps that are open before adding your printer may need to be quit and re-opened in order to see all the features of the added printer.
      • Important: Avoid installing printer drivers from the discs that came with your printer. The software on these discs may not be as new as what is available using Software Update. Instead, follow the instructions that came with the printer to unpack, install ink or toner, and insert paper. Then, use the instructions in this article to set up the printer on your Mac.

      Printer Setup

      Select the kind of printer you want to connect from the list below for more information.

      Collapse All | Expand All

      Add a USB printer

      Connect the USB printer to the Mac, and a print queue will be automatically created for it. If the Mac already has current software for the printer, the print queue is created for you in the background. If software is needed, OS X will automatically prompt you.


      If prompted, follow the onscreen software install instructions to complete the process.

      Add an AirPrint or nearby network printer

      With OS X Lion and later, you can quickly add a printer that is nearby on your network. This includes:

      • AirPrint printers that are on your Wi-Fi or local network.
      • Nearby Wi-Fi printers or wired network-based printers that are on your local network and support Bonjour.
      • A printer connected to the USB port of a Time Capsule or AirPort base station on the home network.
      • A printer that is being shared by another Mac on the home network.

      To add a nearby printer from the print sheet: Select the printer you want from the Printers pop-up menu.

      If the printer is an AirPrint-compatible, OS X adds it without downloading and installing any additional software. If software is otherwise needed for the printer, OS X connects to an Apple server to download the latest available drivers. Make sure your computer is connected to the Internet to download this software.

      Use System Preferences

      You can also add a printer from System Preferences. This is useful if you know the IP address of a network printer.

      1. Choose Apple menu > System Preferences Then choose View > Print & Scan.

      Note: If the Print & Scan lock icon is locked, click the lock icon and, when prompted enter an administrator name and password to unlock it. 

      Click the add printer (+) button to add a printer. You can also click and hold the add printer to quickly select a nearby printer on your network that you want to add.


      If there are no nearby printers on your network, select "Add Other Printer or Scanner".

      Tip: To directly open the Add Printer dialog box, click the Add (+) button.

      From the Add Printer toolbar there are these choices:

      • Default – Use this option to display a list of all printers your Mac already sees connected to your computer through USB, a network connection, or other methods. Select a printer you see here and click Add. If there is a long list of printers, you can search for the printer you want using the search field in the top-right.
      • Fax – Use this option to add a queue for a third-party Fax device connected to the Mac.
      • IP – Use this option to add a network printer that is not nearby. Printers that support the Internet Printing Protocol (IPP), Line Printer Daemon (LPD), and HP Jetdirect (Socket) can be added as IP printers. You need to know the IP address or URL of a printer (such as 10.0.1.1 or myprinter.example.local) to add it using this method. If you're not sure what your printer's IP address is, ask your network administrator or check the printer's documentation.
      • Windows – Use this option to add a printer that is shared using the Windows printer sharing protocol (CIFS/SMB). See File Sharing for details about how to add a Mac to a Windows Workgroup. Configuring the Sharing pane of System Preferences may be needed to see some Windows printer shares. 

      How to print

      Once you have your printer set up, all you have to do is choose File > Print from any app that can print. As a shortcut, you can also type ⌘P (Command-P).  When you print a document, OS X displays a print sheet where you can set additional options for your print job.

      From the basic print sheet you have these options:

      • Choose the destination printer from the Printer pop-up menu. If you don't see your printer, choose Add Printer from this menu.
      • Choose the printer presets to apply to the print job from the Presets menu. Presets are pre-configured combinations of printer feature options.
      • Enter the number of copies the printer should output in the Copies field.
      • Select which pages you want to print using the Pages field, including printing a single page, all pages, or a specific range.
      • The print sheet also includes a preview of the print job if the app supports it. Use the arrows under the preview to review each page of the print job before it prints.
      • Click the Help button (?) in the lower left corner of the print sheet to see more information about printing.
      • Use the PDF button to create a PDF of your printout instead of a physical print. Click and hold the button to see a menu of additional options.
        For more information about using the PDF feature, see the "Generate PDF output" section of this article.
      • Clicking cancel takes you back out of the print sheet without printing.
      • Click Print to accept your current print settings, and to send your document to the printer. Once clicked, your print job appears in the printer's queue.

      Clicking the Show Details button gives you additional control of how your printout is handled.

      full print sheet

      In addition to the details shown in the standard print sheet, the Details sheet gives you these options:

      • Choose the Paper Size menu to match the size of your printed output to match the paper in your printer. You can create and manage custom paper sizes here as well.
      • The Orientation buttons allow you to choose portrait or landscape output.
      • Make the content of your printout a larger or smaller size by changing the value of the Scale field. The print preview changes to reflect scaling changes you make.
      • The Application and Printer settings menu depend on the printer and application used. Specific printer-related features appear in this menu.
      • Use the Save Preset option in the Presets menu to save your current settings so that you can easily apply them to future print jobs.
      • Clicking Hide Details returns the print sheet to its shorter, standard view.

      Tip: Your images don't need to be any larger than 360 dots per inch (dpi). Trying to print images greater than this resolution takes longer to print and uses more space on your startup drive, without any discernible change in print quality. See this article for more information.

      Additional Print Options

      You can also manage your print jobs, and print directly to a PDF file instead of a printer. Click on any of the topics below to learn more.

      Generate and manage PDFs

      Preview the print job as a PDF or save it as a PDF file (with metadata).

      Click the "PDF ▾" button in any printer sheet, and the PDF workflow menu will drop down with these options:

      1. "Open PDF in Preview" - Generates a PDF of the print job and opens it in the application Preview.
      2. "Save as PDF…" - Creates a PDF of the print job to a destination of your choice with options to add metadata to the PDF (Title, Author, Subject and Keywords). Metadata is useful when you use Spotlight.  
        • Clicking "Security Options" will open the PDF Security Options dialog box, there are these options:
          • Require password to open document
          • Require password to copy text, images and other content
          • Require password to print document
      3. "Save as PostScript…" -  Generates a PostScript file of your print job to a destination of your choice.
      4. "Fax PDF" - Generates a PDF of the print job and sends it to your fax device for transmission. Note: An OS X Mountain Lion or OS X Lion compatible third-party fax device is needed.
      5. "Mail PDF" - Generates a PDF of the print job is attached to a new email document.  Add email recipients and send it.
      6. "Add PDF to iTunes" – Generates a  PDF of the print job will be added to iTunes, where you can add it to iBooks.
      7. "Save PDF to Web Receipts Folder" - Generates a  PDF of the print job will be saved to your "~/Documents/Web Receipts" folder.
      8. "Edit menu…" - Add / remove printing workflows.  See Automator to learn how to create new printing workflows.

      Manage the printer queue and printer dock icon

      Once a print job is started, the printer dock icon appears. Click the printer dock icon to open the printer queue, which is a list of print jobs that are printing, on hold, or paused. The print queue will also display messages sent from the printer; for example, "The printer is not connected."

      Control-clicking the icon will bring up the Dock menu for your printer queue, as shown.

      Tags on the printer queue icon include:

      • Red tag with a number indicates the number of print jobs in your printer queue, the above example is indicating two print jobs.
      • Green tag with a pause symbol indicates the printer queue has been paused, as shown above. Note: There is no green icon when the printer queue is resumed.
      • Yellow tag with a bolt icon indicates there is an issue with the printer; for example, the printer is not currently connected to your Mac.

      You can also open the print queue from the "Print & Scan" pane of System Preferences.  Here is a sample print queue:

      From the printer queue you can perform the following:

      • Delete – Delete print jobs
      • Hold / Resume – Hold or resume print jobs
      • Job Info – Click to see the printer options of the print job
      • Pause / Resume – Pause or resume the printer queue
      • Supply Levels – Click to see the supply levels of your printer; options depend on the model of printer
      • Printer Setup – Click to see options for naming your printer queue, and other choices; the options depend on the model of printer
      • Printer / Scanner – Present if you are connected to a Multi-Function Printer.  Alternate between the two buttons to switch from Printer Queue to Scanner Tool. See this article for scanning details
      • Tip: Click on a print job to highlight it, then press the Spacebar to see a Quick Look of your print job; alternatively, click the arrow beside the job's name

      Share your printer

      To enable printer sharing, open the Sharing pane of System Preferences, then select the Printer Sharing "On" checkbox found in the list of services on the left side.

      Choose which print queue to share by selecting its checkbox in the Printers column.

      By default, the "Everyone" group can print to your shared Printer Queue. If you want to control access to your shared printer, click the + (plus) button below the Users column. Highlight one or more users or groups in the sheet that appears, and click Select to add them. Once added, the Everyone group access will be set to "No Access".

      Tip: If you want a Windows PC to use a Mac printer share to print, install Bonjour Print Services for Windows.

      More Information

      Apple Resources

      Third-party information

      • See this Microsoft page for information about Windows CIFS browse protocol
      • See this Microsoft page for information about troubleshooting Windows CIFS protocol

      Third-party printer websites

      Additional Information


      Important: Mention of third-party websites and products is for informational purposes only and constitutes neither an endorsement nor a recommendation. Apple assumes no responsibility with regard to the selection, performance or use of information or products found at third-party websites. Apple provides this only as a convenience to our users. Apple has not tested the information found on these sites and makes no representations regarding its accuracy or reliability. There are risks inherent in the use of any information or products found on the Internet, and Apple assumes no responsibility in this regard. Please understand that a third-party site is independent from Apple and that Apple has no control over the content on that website. Please contact the vendor for additional information.
      Last Modified: Feb 12, 2014
      Helpful?
      Yes
      No
      One Moment Please
      Thanks for your feedback.
      Email this article
      Print this page
      • Last Modified: Feb 12, 2014
      • Article: HT4670
      • Views:

        1261762
      • Rating:
        • 52.0

        (2001 Responses)

      OS X: Manually migrating data from another Mac

      Posted in Apple Mac OS

      Migration Assistant is the easiest way to move users, documents, computer settings and other items from an older computer to your new Mac. You can use it to migrate data from another Mac, or even from a Windows PC. If your original computer is too old to work with Migration Assistant, you can use the steps in this article to manually copy many of your documents to your newer computer.

      Before you begin

      Before you begin copying files from your old computer to your new computer, do these steps.

      Set up your new Mac

      Go through the Setup Assistant on your new Mac if you have not already. Then, create a user account for each user that you want on your new Mac. 

      Determine which files to copy

      Before you copy anything from your old computer to your new computer, consider what you want to transfer and where the files belong on your Mac.

      Documents and other data

      In general, you can move any of your documents, music, movies and other files from one computer another. Simply copy the files to the same locations on your new Mac. For example:

      • Find your Home folder by looking in the Users folder on the top level of the startup disk on each Mac. Each user's home folder is named after the user and contains documents, movies, photos and other data related to that user.
      • Copy your Documents into the Documents folder of your new Home folder.
      • Place the iTunes music folder from your old Home folder into your new Music folder. Your music should then automatically be recognized when you open iTunes.
      • Place your iPhoto library into the Photos folder on your new Mac. iPhoto should automatically recognize it when you open it. If not, you may need to upgrade your library first.

      Apps

      Some applications need to install support files in special locations before they work. Instead of copying your apps from one computer to another, use these steps:

      • Check to make sure the app isn't already installed. Many Apple apps such as iPhoto, Pages and iTunes are already installed when you get your Mac.
      • Open the App Store from the Apple menu and log in using the same account you used on your old computer. You can re-download any apps you've purchased previously from the Purchases tab.
      • Use Software Update to check for any available free updates for apps you've purchased. Some apps may require updates to work their best on newer computers.
      • Re-download or reinstall any other applications you've purchased from third parties using the instructions provided by the developer of the software you're using. 

      Copying your Files

      Choose one of the methods below to move files from your old computer to your new computer

      Use an external drive


      If both of your computers have USB or FireWire connections, you can copy your important files to an external drive to move the files between them.

      1. Connect the external drive to your old Mac.
      2. In the Finder, locate the external drive. If you don't see it, choose Go > Computer to see a list of all of the drives connected to this Mac.
      3. In the Finder, drag any of the files you want to move to your new computer onto the external drive to make a copy.
      4. Once you are done copying all of your files, eject the external drive and disconnect it from your old Mac.
      5. Next, connect the external drive to your new Mac.
      6. Locate the drive in the Finder.
      7. Drag your files from the exernal drive to your Home folder, or another location on your new Mac.

      Use Target Disk Mode

      If both of your computers have FireWire or Thunderbolt ports, you can use Target Disk mode to connect one of your computers as an external drive. You may need additional cabling, such as a Thunderbolt to FireWire adapter or a FireWire to FireWire 800 cable depending on how old your original Mac is.

      1. Restart your old computer and hold down the T key on the keyboard. Once you see the FireWire logo appear on the screen, you can release the key.
      2. Connect the FireWire ports of the two computers using a FireWire cable and any necessary adapters.

      The startup drive of the old computer should now show up in the Finder when you are logged in on the new computer. Use the steps in the section "Use an external drive" to copy your files from your old computer to your new Mac. 

      Use File Sharing

      If both of your computers are connected to the same network, you can use File Sharing to copy items between them.

      First, connect your Macs to the same network using Wi-Fi or Ethernet. If you don't have access to a larger network, you can simply connect an Ethernet cable between your two computers. If your computer doesn't have an Ethernet connection, check to see if you have a USB to Ethernet adapter you can use, or a Thunderbolt to Ethernet adapter.

      Next, enable File Sharing on one of the computers.

      1. Open System Preferences.
      2. Select Sharing.
      3. Make note of the name of this computer in the Computer Name field.
      4. Select (check) the option for File Sharing. 

      On the other Mac, connect the two computers using these steps:

      1. Click the Finder icon in the Dock to switch to the Finder.
      2. Choose Go > Connect To Server.
      3. Click the Browse button.
      4. Locate the other computer in the window that appears. Double-click the computer's icon.
      5. If prompted, enter the user name and password for the user's files you are trying to copy.

      You can now copy files between the two computers for this user. Repeat the steps above for any other users you have on your computer.

      When you're done

      After you finish copying over all of your files, conisder deauthorizing iTunes on your old Mac if you aren't going to use it anymore. See "What to do before selling or giving away your Mac" for more information.

      Read Full Article

      Adobe Flash Player updates available for OS X on February 4, 2014

      Posted in Apple Mac OS

      Adobe Flash Player updates are available that address a recently-identified Adobe Flash Player web plug-in vulnerability.

      When attempting to view Flash content in Safari, you may see this alert: "Blocked Plug-in".


      Selecting it will display this alert: 

      "Adobe Flash Player" is out of date.

      1. Click "Download Flash…" and Safari will open the Adobe Flash Player installer website.
      2. Click the "Download now" button to download the latest Adobe Flash Player installer.
      3. Open the downloaded disk image.
      4. Open the installer and follow the onscreen instructions.
      Important: Information about products not manufactured by Apple is provided for information purposes only and does not constitute Apple’s recommendation or endorsement. Please contact the vendor for additional information.
      Last Modified: Sep 13, 2013
      Helpful?
      Yes
      No
      One Moment Please
      Thanks for your feedback.
      Email this article
      Print this page
      • Last Modified: Sep 13, 2013
      • Article: HT5655
      • Views:

        319736
      • Rating:
        • 62.0

        (8255 Responses)

      Boot Camp: Press any key message appears while installing Windows 8 using DVD media

      Posted in Apple Mac OS

      This symptom may happen if you try to install Windows using a Windows 8 DVD. To install Windows 8 on a Mac that displays this behavior, create an ISO image of the install disc instead.

      1. While started from OS X, insert the Windows 8 DVD in an external optical USB drive.
      2. After the DVD mounts, Open Disk Utility from the Utilities folder (choose Go > Utilities from the Finder).
      3. Select the USB optical drive so it is highlighted in the Disk Utility window.
      4. Click on the New Image icon at the top of the Disk Utility window.
      5. Select DVD/CD master from the Image Format pop-up menu, then choose none from the Encryption menu.


      6. Give the new file a name, then click on Save. The Creating image dialog appears with a progress bar. It may take some time to create an image file from your Windows DVD.
      7. Once imaging is complete, quit Disk Utility.
      8. From the Finder, locate the disk image file you created earlier. Single click on it so its icon is highlighted, then press the Enter or Return key on your keyboard to rename the file. Change the disk image file extension from .cdr to .iso. When prompted, click "Use .iso" to verify this change.


      9. Eject the Windows DVD.
      10. Insert a blank USB 2 flash drive that is a least 16GB in size into a USB port on the computer. Boot Camp Assistant uses this drive to store the Windows 8 install media and support drivers during installation of Windows.
        Note: This flash drive needs to be formatted for the FAT32 file system and must use the Master Boot Record partitioning scheme. Use Disk Utility to check the format of the flash drive before proceeding, and erase or reformat the flash drive if necessary.
      11. From the Go menu in the Finder select Utilities.
      12. Open the Boot Camp Assistant app in the Utilities folder.
      13. Click Continue.
      14. Make sure the following options are selected (checked) in the Boot Camp Assistant window:
        √ Create a Windows 8 or later install disk
        √ Download the latest Windows support software from Apple
        √ Install Windows 8 or later version

        Boot Camp Assistant

      15. Click Continue.
      16. When prompted to select an ISO image, click Choose, then select the ISO image you created in Step 7, then click Open.
      17. When prompted to save Windows drivers by the assistant, select the flash drive you inserted in Step 10 as your destination disk. Click Continue.
        A warning message appears. If you click Continue you will erase and reformat the flash drive. Click Continue to erase the flash drive.
      18. A task status dialog appears with a progress bar. Do not disturb your computer during this process. Boot Camp Assistant creates Windows install media on the USB flash drive, and downloads and copies related Windows drivers to the same drive.
      19. Next, a dialog appears asking for a password to install the Boot Camp Assistant helper tool. Type in your administrator password and click Add Helper.
      20. Follow the on screen instructions to partition your drive and to install Windows 8.

      Read Full Article

      OS X: When your Mac doesn't sleep or wake

      Posted in Apple Mac OS

      What is sleep?

      Sleep is a low power, energy-saving feature that offers both environmental and economic benefits, as well as helping to extend the life of batteries and displays. You can learn more about sleep from the article, "OS X: Saving energy with Sleep".

      Preventing sleep

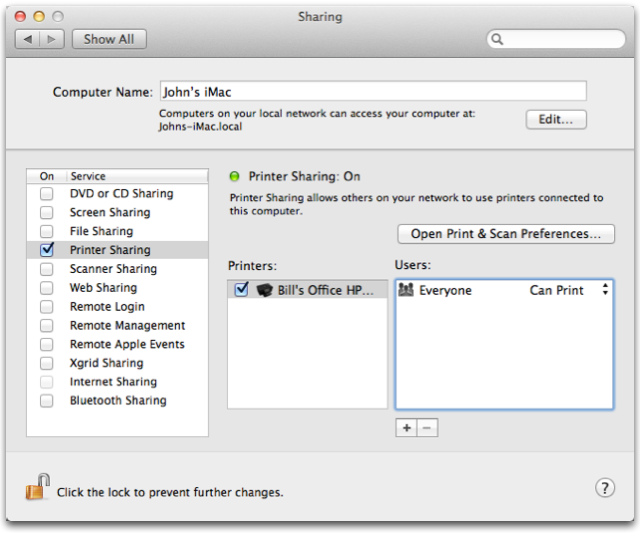
      Some processes prevent your computer from sleeping by design. For example, if you share files from your Mac, and another computer is actively connected and using one of these files, your display may sleep, but the computer itself may remain on during the active connection. Once the other computer finishes with the shared files, your computer can go back to sleep. If someone needs to connect to your Mac again, it may wake back up.

      Examples of activities that might prevent your display or computer from automatically going to sleep include:

      • Watching a DVD or movie
      • Listening to music in iTunes
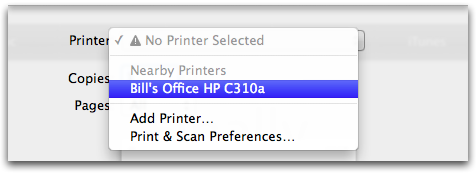
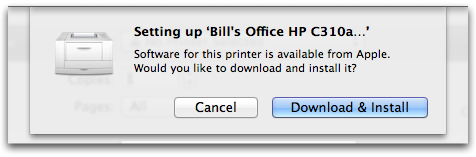
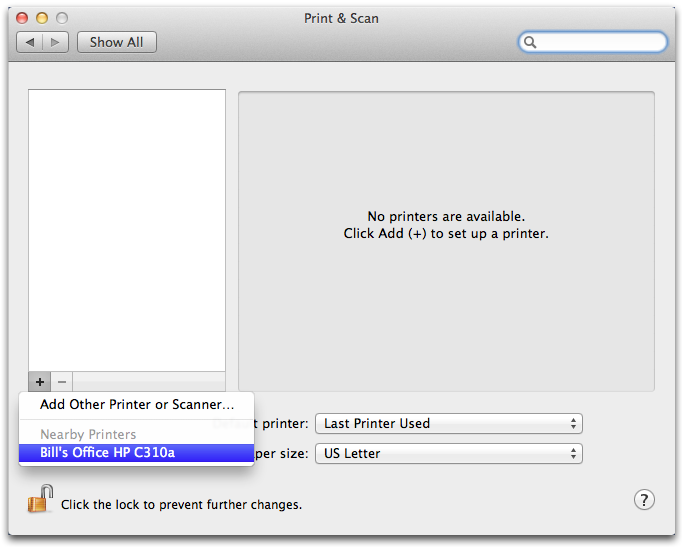
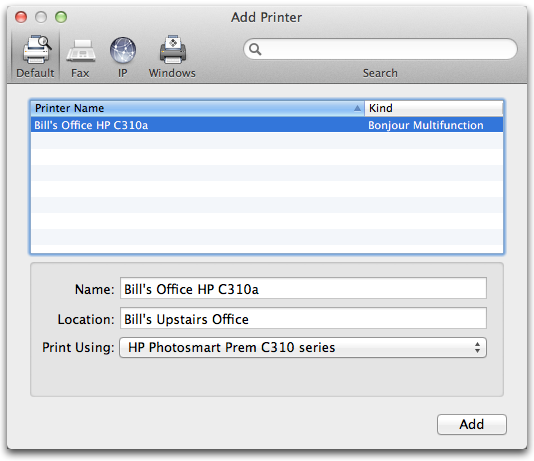
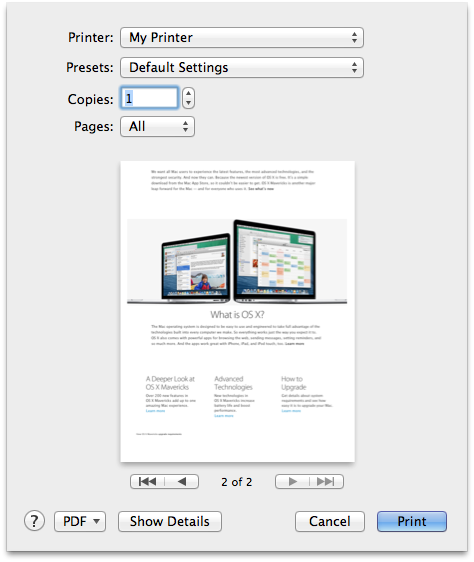
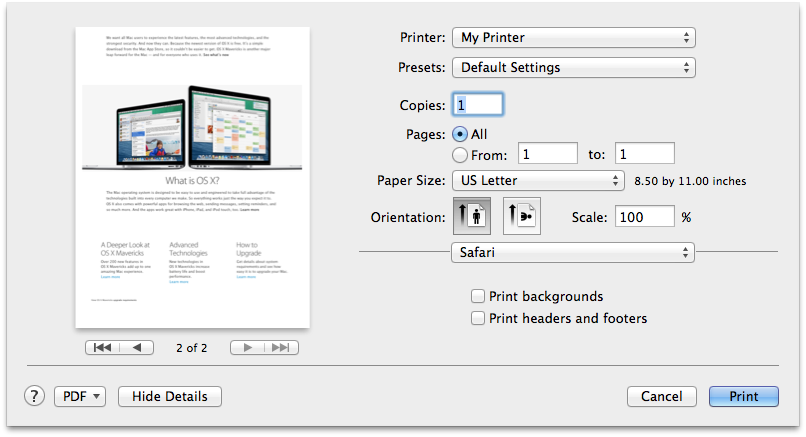
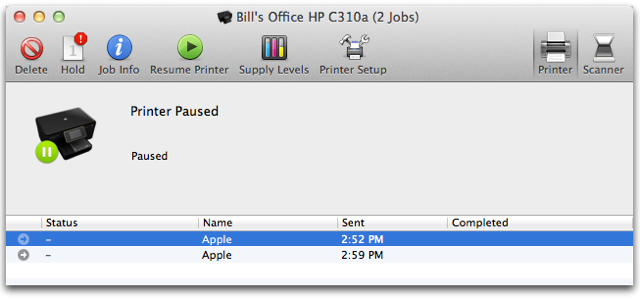
      • Printing
      • Downloading large files in the background.

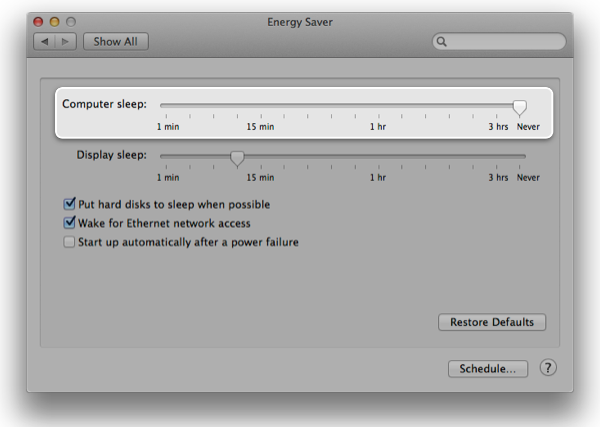
      On some Mac models, you can also prevent the computer from going to sleep by setting the "Computer sleep" slider to Never in the Energy Saver pane of System Preferences. 

      sleep set to never

      If your computer isn't sleeping when left inactive

      If your computer isn't going to sleep when you expect it to, check to see if there is a "Computer sleep" slider, or try these additional steps to isolate or resolve the issue.

      Close apps

      Some applications prevent sleep. Try quitting open apps one at a time to make sure none of the apps you are using are keeping your Mac from sleeping.

      Restore Defaults in Energy Saver preferences

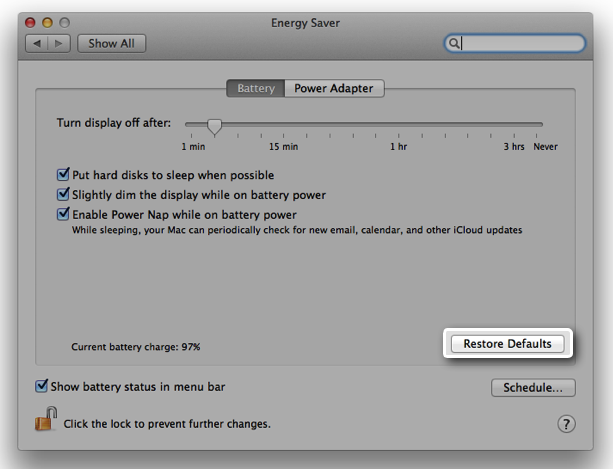
      You can reset Energy Saver settings back to the way they were when you first got your Mac. To do this, select the option "Restore Defaults" in Energy Saver preferences.

      1. Choose System Preferences from the Apple () menu.
      2. Click the Energy Saver icon in the System Preferences window.
      3. Click the Restore Defaults button in the Energy Saver window.
      4. If you are on a Mac notebook computer, click the Battery or Power Adapter tab to switch settings. Click the Restore Defaults button in both panes if needed.

      restore defaults

      Specific symptoms

      If you are experiencing one of the following symptoms, follow its related troubleshooting steps to resolve the issue.

      Your computer sleeps at unexpected times

      Make sure you have not set a Hot Corner that tells the display to sleep, or the computer to sleep.

      hot corner

      See the following related articles for this symptom.

      Your computer wakes unexpectedly

      If you are using a compatible router, such as an AirPort Base Station, your Mac can automatically wake up when someone accesses sharing services from your Mac remotely.

      Your Mac may also wake for short periods of time to perform tasks as part of Power Nap.

      Some third party devices connected using USB or Bluetooth may also wake your computer periodically. For example, older Bluetooth mice may send a signal when they power down. This signal may inadvertently wake your Mac. Turning on bluetooth headphones can also send a signal that wakes your Mac.

      Your computer cannot wake from sleep

      Make sure your computer isn't powered off by pressing the power key for one second.

      If you're using an external display, make sure your display is not powered off or unplugged.

      If you are using a Mac notebook:

      • Make sure the computer's battery is charged. Try connecting the power adapter to the computer, then press the power button for one second to see if the computer powers on.
      • Make sure the AC power cord is connected securely to the power outlet, and that the outlet it is working correctly. Confirm the power adapter or cable is attached firmly.
      • If your computer is plugged into a power strip, make sure the power strip is not turned off. Check to make sure other items connected to the power strip are receiving power.
      • Confirm the right power adapter is connected on Mac notebook computers. If a lower wattage power adapter is used than the one that came with your Mac, it may not provide enough power to charge the battery while the computer is powered on. Make sure there is no debris in the MagSafe port that might prevent charging. When your MagSafe cable is connected properly, you should see a green or orange light on the connector.

      If you are using a Mac desktop:

      • Make sure the AC power cord is connected securely to the computer and outlet.
      • Make sure the AC power outlet it is connected to is working properly.
      • If your computer is plugged into a power strip, make sure the power strip is not turned off. Check to make sure other items connected to the power strip are receiving power.

      Your computer is slow to wake from sleep

      If you see a progress bar when you wake your computer from sleep, this is normal. The computer is waking from safe sleep.

      OS X Recovery and sleep

      The system software your computer uses when started from OS X Recovery allows display sleep. Your computer does not go to sleep on idle while started from Recovery unless you are using a Mac notebook that is not connected to AC power.


      Additional troubleshooting

      If the steps above do not resolve your sleep-related issue, try these additional recommendations.

      Reset SMC

      The System Management Controller (SMC) is involved in managing power on your computer. Reset the SMC on your Mac if you are having difficulty sleeping or waking your computer.

      Reset NVRAM/PRAM

      Nonvolatile RAM (NVRAM)/Parameter RAM (PRAM) stores some power-related settings.Try resetting NVRAM/PRAM if you are having difficulty sleeping or waking your computer.

      Test with external devices disconnected

      Some external devices can prevent your computer from sleeping. Try disconnecting items other than your Apple keyboard or mouse from the built-in USB, Thunderbolt and Firewire ports on your Mac. If this resolves the issue, try reconnecting your external devices one at a time until you find the device preventing sleep or wake. Check the documentation that came with the device, or contact the device manufacturer for more information.

      Try Safe Mode

      Check to see if the issue still occurs when the computer is started in Safe Mode. If this resolves the issue, it could be related to a third party software item such as:

      Try another user account

      Try creating another user account, or log in as guest. See if your computer sleeps and wakes properly from the additional user account. If it does, your issue may be related to one of the following:

      You can disable login items from the Accounts pane of System Preferences. Try opening only one app at a time in the original user account to determine which app is preventing sleep. If you isolate the issue to a particular app or login item, check its documentation, or contact the developer of that software for more information.


      Read Full Article