OS X Mavericks includes Tags – a powerful new way to organize your files. Whether your files are on your Mac or in iCloud, you can find them with just one click
Using Tags
With Tags, you can organize files by project, without having to move them into a folder. Your tags automatically appear in the Finder sidebar, so it’s easy to find tagged files no matter where they’re located.
To learn how to tag files and folders, find tagged items, and configure tags, click a topic below.
Expand All
Tagging a file
When you save a file
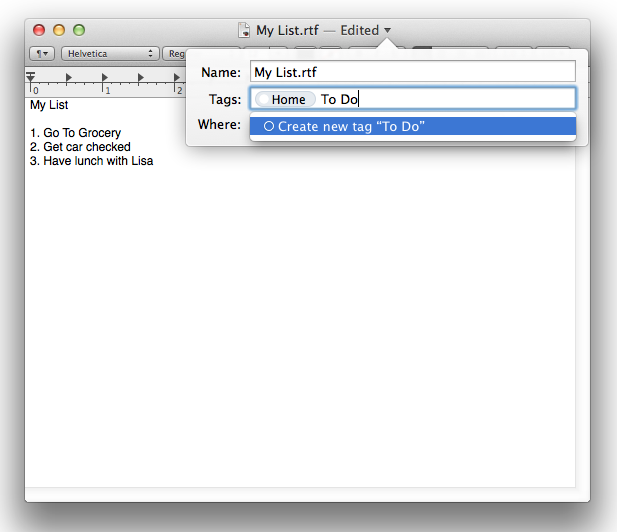
You can add tags to a file when you save it. This makes it easy to find the file later.
- In an app, choose File > Save, or File > Export.
- In the sheet that appears, click the text field next to “Tags:”
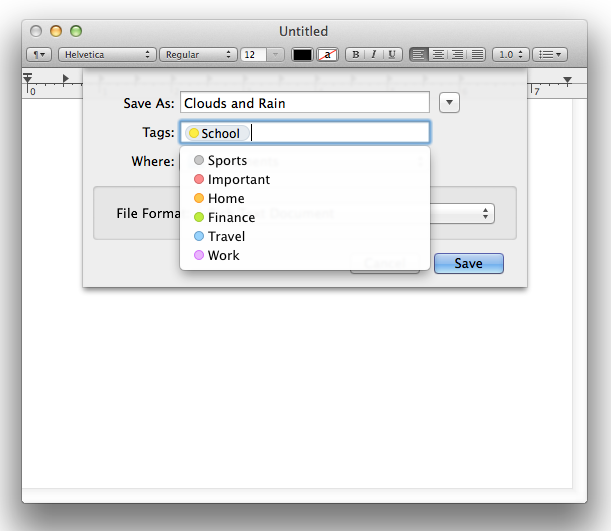
- To add a tag:
- Click on a recent tag that appears in the menu to link it your document. You can even add multiple tags.
- Click “Show All…” to see the all of the tags you have created. Then, click on a tag to add it.
- You can also add tag by typing. As you type in the Tags field, you’ll see matching suggestions from your existing tags.
- To add a new tag, just type it in the field.
- New tags you create automatically appear in other locations where tags are visible, such as in the Finder sidebar.
- To remove a tag from your document, click the existing tag in the Tags field to highlight it, then press the Delete key.
From the Document menu
OS X Mavericks includes a document menu you can use to update your file's name and other properties – including Tags. Hover your cursor over a document window's name, and click the menu button to the right of the document name. You can add and edit your tags from the popover menu that appears.
In the Finder
If you've already saved a file, you can tag it directly from the Finder.
- Select the files and folders you want to tag.
- Control-click, or right-click on one of the highlighted items.
- Select a favorite tag from the shortcut menu that appears. Select it again to remove a tag.
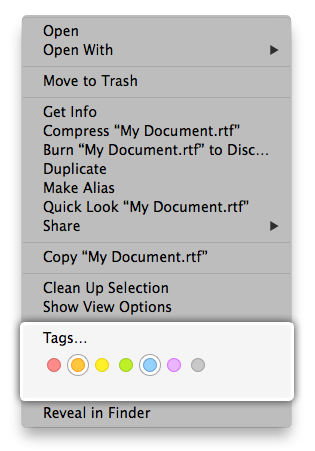
Select “Tags…” to access the Tags popover menu.
- To add a tag from the popover menu:
- Click on a favorite tag that appears in the menu to link it your document. Keep clicking your favorites to add more tags to this document.
- Click “Show All…” to see the all of the tags you have created. Then, click on each tag you want to attach.
- In the text field, begin typing the name of any tag you have created. Auto text completion offers each tag that matches what you type. Press return or click on the tag to attach it.
- Start typing a new word or phrase to create a new tag. Press the Return key to create the tag and attach it to your document.
New tags you create automatically appear in other locations where tags are visible, such as in the Finder sidebar.
- To remove a tag from your document, click the existing tag in the Tags field to highlight it, then press the Delete key.
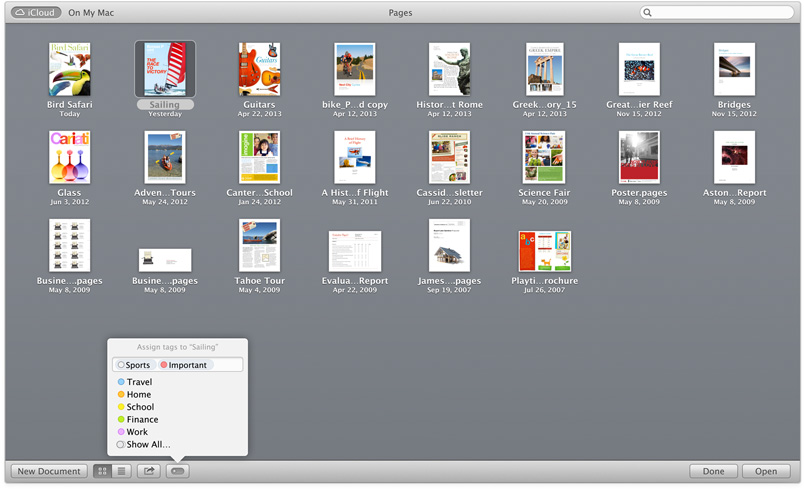
In iCloud
You can also tag files in iCloud so you can create projects with files from your Mac and iCloud. Tag files when opening or saving a file in iCloud, or from the Document menu when the file is already open. The tags you use on your Mac show up on your documents in iCloud.
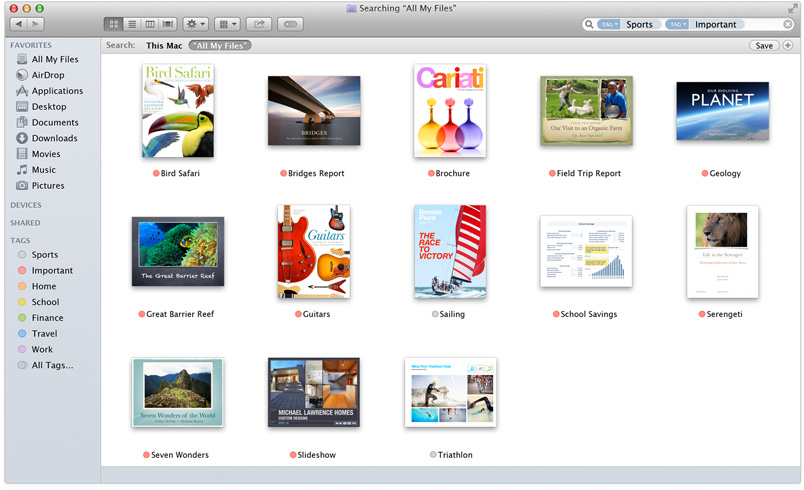
Finding tagged files
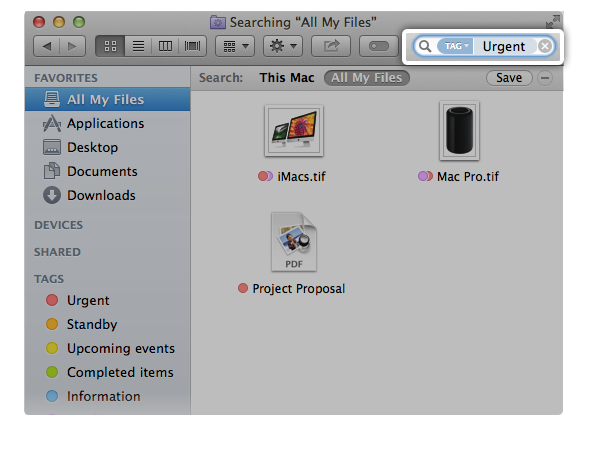
Click on a tag in the sidebar of a Finder window, or in an open or save window, and all items with that tag appear.
In any Finder window, enter the tag you want to find in the search field. Items that have that tag appear. Enter multiple tags to find items to narrow or expand your search.
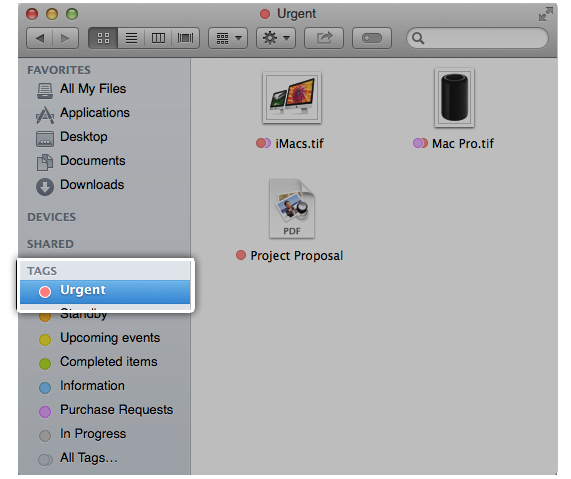
Finder Sidebar
All of your recent tags are listed in the sidebar of Finder windows. To tag an item using the sidebar, drag its icon to the tag in the sidebar of the Finder window.
You can also change Tag properties directly from the sidebar of Finder windows. To edit a tag from the sidebar, Control-click or right-click the tag you want to update.
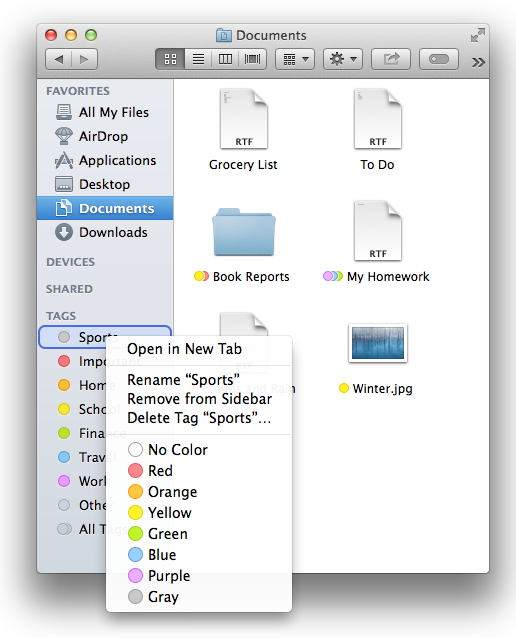
In the shortcut menu that appears:
- Select "Open in New Tab" to open a new Finder tab that shows you all files associated with that tag.
- Select "Rename" to rename a Tag
- Select "Delete Tag" to remove it. Once deleted, a tag is removed from all files associated with that tag and you can no longer use that tag as a search term. If you still want to use the tag again later but don't want to see it in the Sidebar, select "Remove from Sidebar" instead.
- Select a Color, or No Color, to associate a color with a particular tag. The color you select shows up next to an item's filename in the Finder when the tag is associated with that file.
Setting Tags preferences
You can set up tag names, colors, and more from Tags preferences.
- From the Finder, select Finder > Preferences… to open the Finder Preferences window.
- In the Finder Preferences window, click the Tags button.
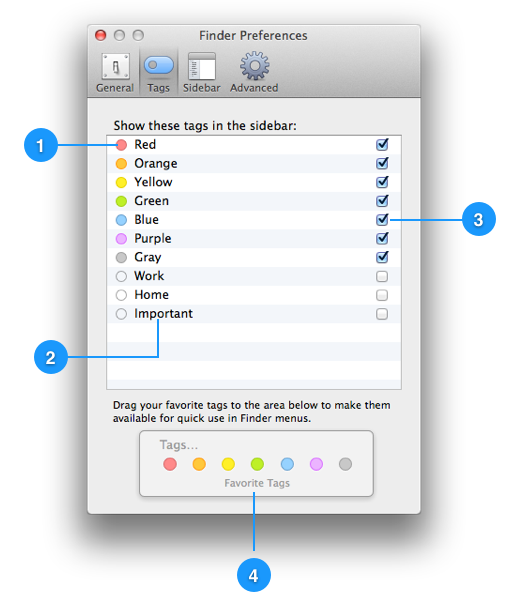
- Tag dot
Each dot corresponds to a tag. These are the same dots that appear next to an item name with that tag in the Finder.
- Click and drag a dot to arrange the order of tags.
- Click and drag a dot to the "Favorite Tags" (item 4) to make it a Favorite Tag.
- Click the dot to assign it a color, or no color.
- Control-click or right-click a dot to rename or delete its tag.
- Tag label
This is the text-based name of each tag. Give the tag a unique name that you can use to search or organize with later.
- Click it to rename the tag
- Sidebar preferences
Tags can be new, active, or inactive. Inactive tags don't appear in the sidebar, but can still be added to items and searched for.
- A hyphen (-) denotes a new tag.
- A checkmark (✓) means that this tag shows up in the sidebar of dialogs and Finder windows.
- If you deselect (uncheck) a Tag, it can still be used, but it doesn't show up in the sidebar of dialogs and Finder windows.
- Favorite Tags
Favorite Tags appear in the File menu and shortcut menus of the Finder
- Drag a tag from your tag list to the Favorite Tags pane in Tags preferences. You can replace favorites by dragging a new tag to an existing favorite's spot in the Favorites pane.
- Drag your favorite tags in the Favorites pane to rearrange them.
- Drag a favorite tag out of the Favorites pane in the preferences window to remove it from your favorites.
Last Modified: Oct 22, 2013
One Moment Please
Thanks for your feedback.
73% of people found this helpful.
Additional Product Support Information
 Twitter
 Facebook