Mac Pro (Late 2013): Removing and installing flash storage
The Mac Pro (Late 2013) can have up to 1TB of internal PCIe-based flash storage. Follow the instructions in this article to remove and install flash storage.
The Mac Pro (Late 2013) has one user-accessible flash storage slot supporting flash storage capacities of 256GB, 512GB, or 1TB.
Before removing flash memory, make sure your data is backed up. Also, be sure you are planning to use a compatible flash storage device.
Part 1: Remove the enclosure
- Before you open your Mac Pro, shut it down by choosing Shut Down from the Apple () menu.
- If the computer is warm to the touch, wait approximately 5-10 minutes for the computer to cool down.
- Touch the metal enclosure on the outside of the Mac Pro to discharge any static electricity.
Important: Always discharge static before you touch parts or install components inside your Mac Pro. To avoid generating static, don't move around the room until you finish installing the flash storage device and slide the enclosure back onto the computer. - Unplug all the cables and the power cord from your Mac Pro. Do not attempt to install flash storage while the Mac Pro is plugged in.
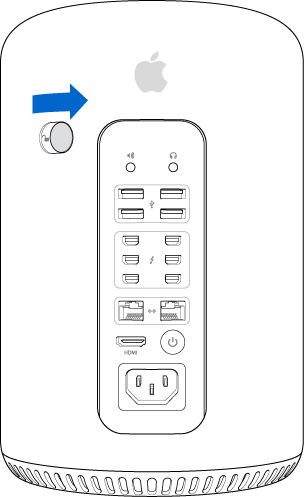
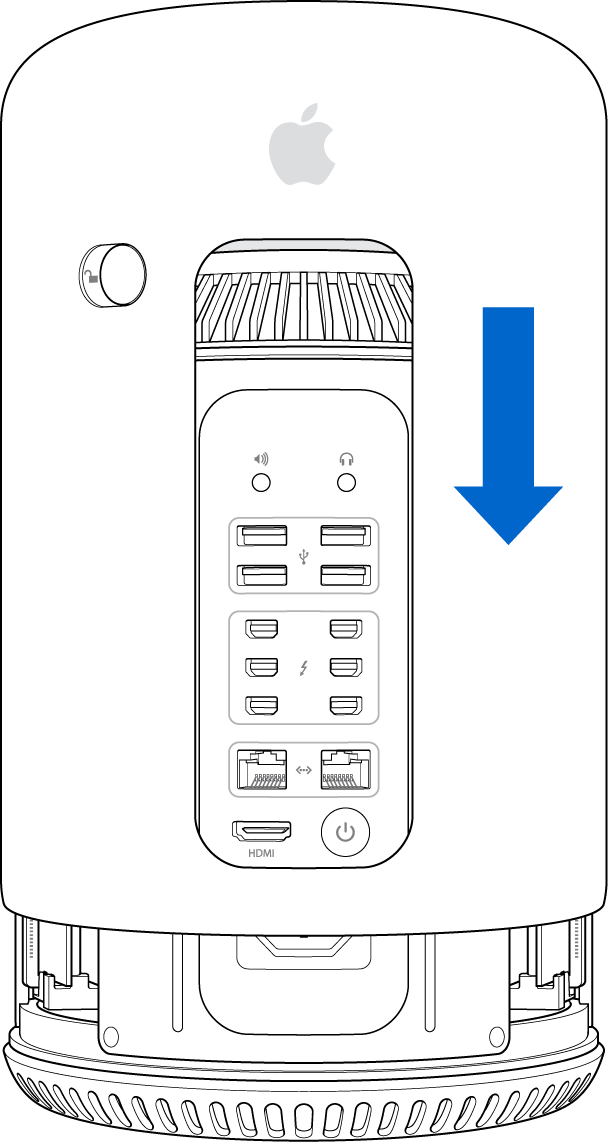
- Slide the enclosure latch to the right to unlock the enclosure.
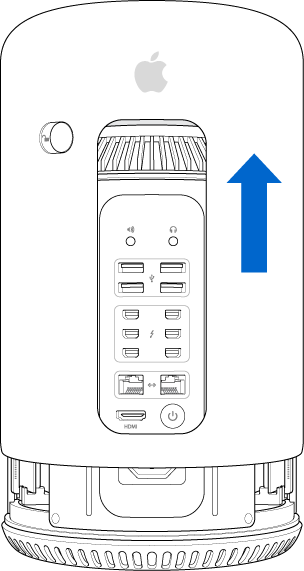
- Next, lift the enclosure straight up and off the computer and carefully set it aside.
Part 2: Remove existing flash memory
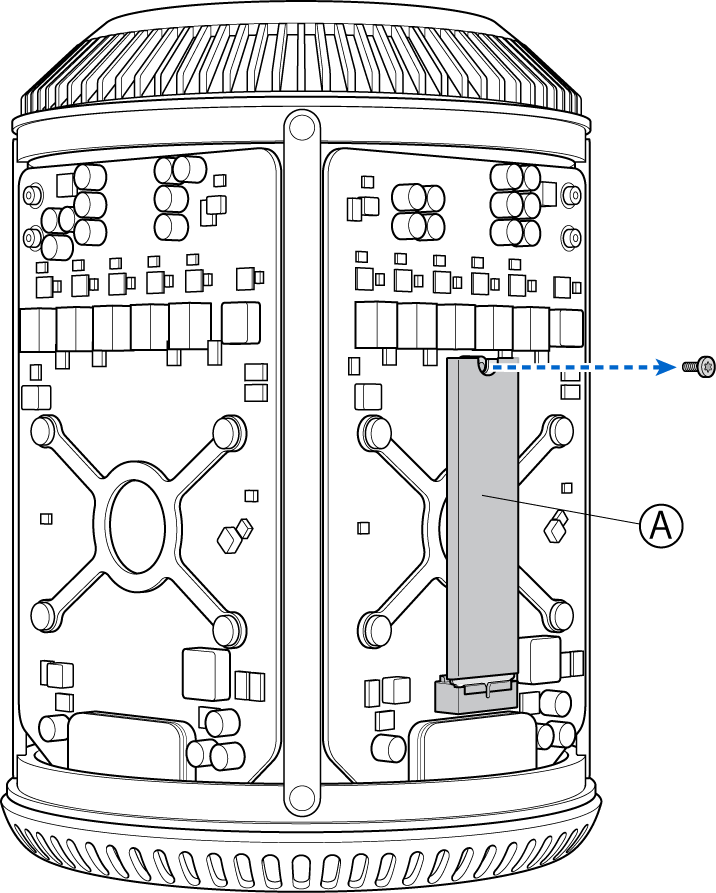
- The flash storage device (A) is attached to the graphics board by a T8 Torx screw.
- Using a T8 screwdriver, remove the screw that secures the flash storage device to the graphics board. Do not let the screwdriver make contact with other areas of the graphics board or damage may result.
- Place the T8 Torx screw in a safe place. You will need it when installing other flash storage.
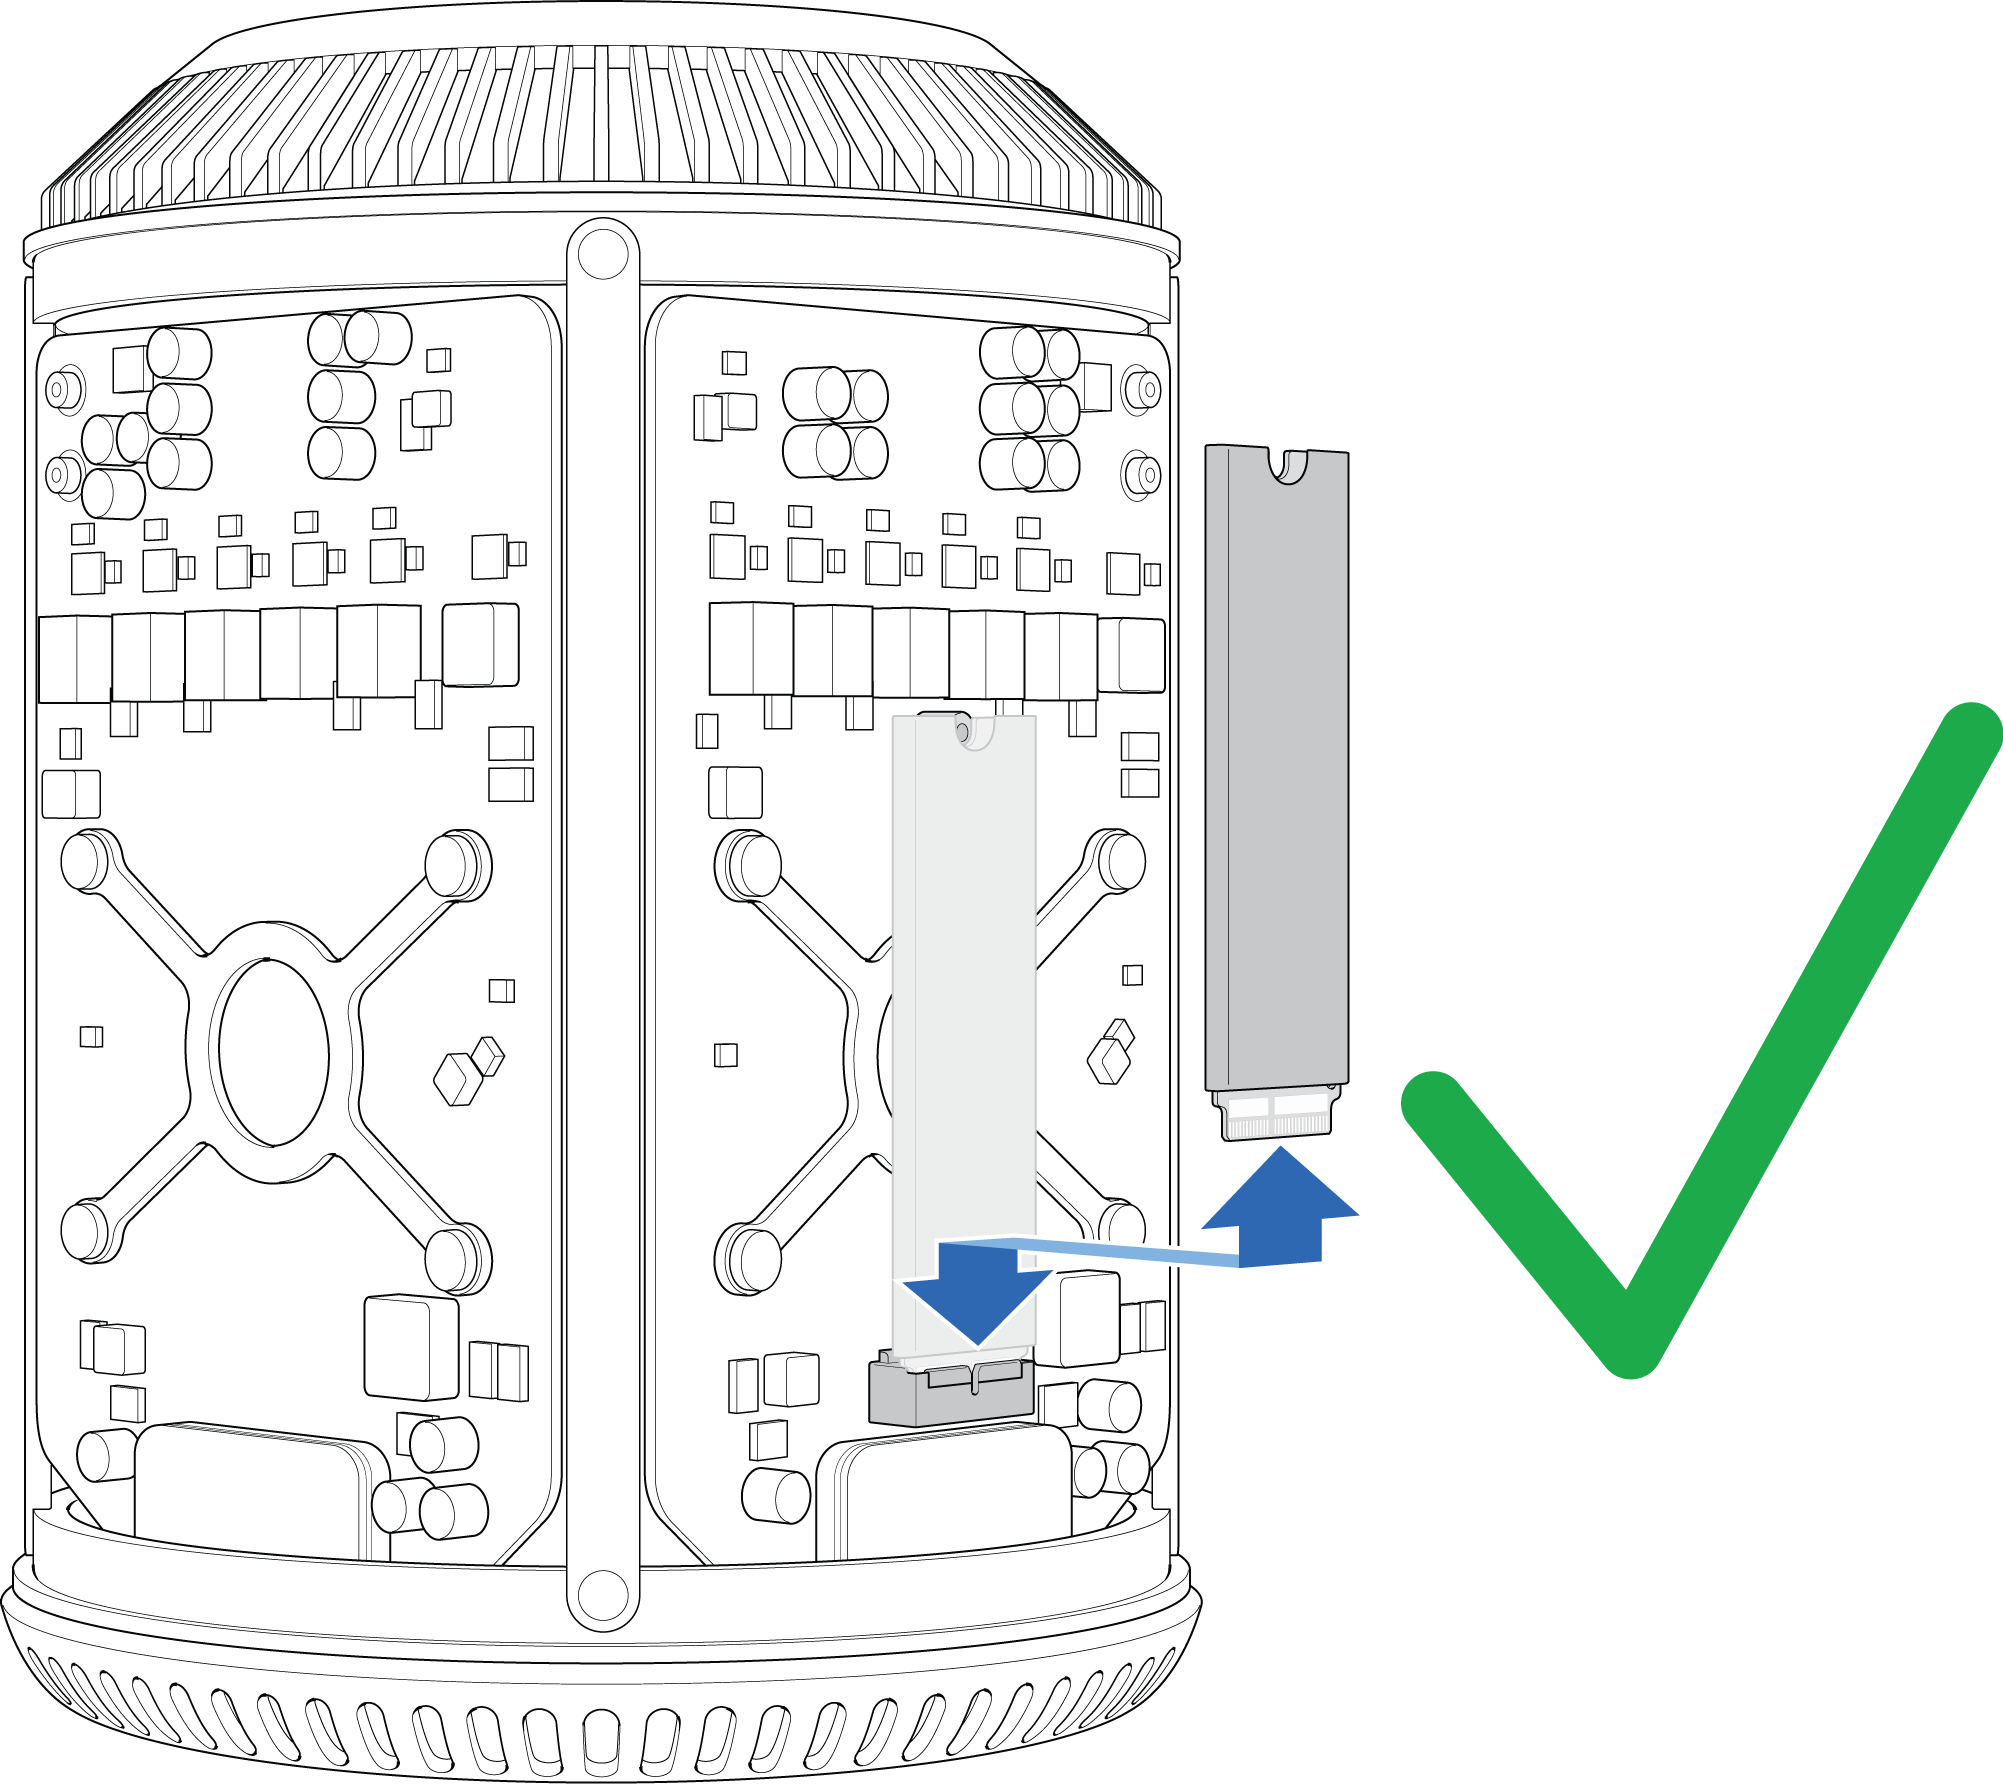
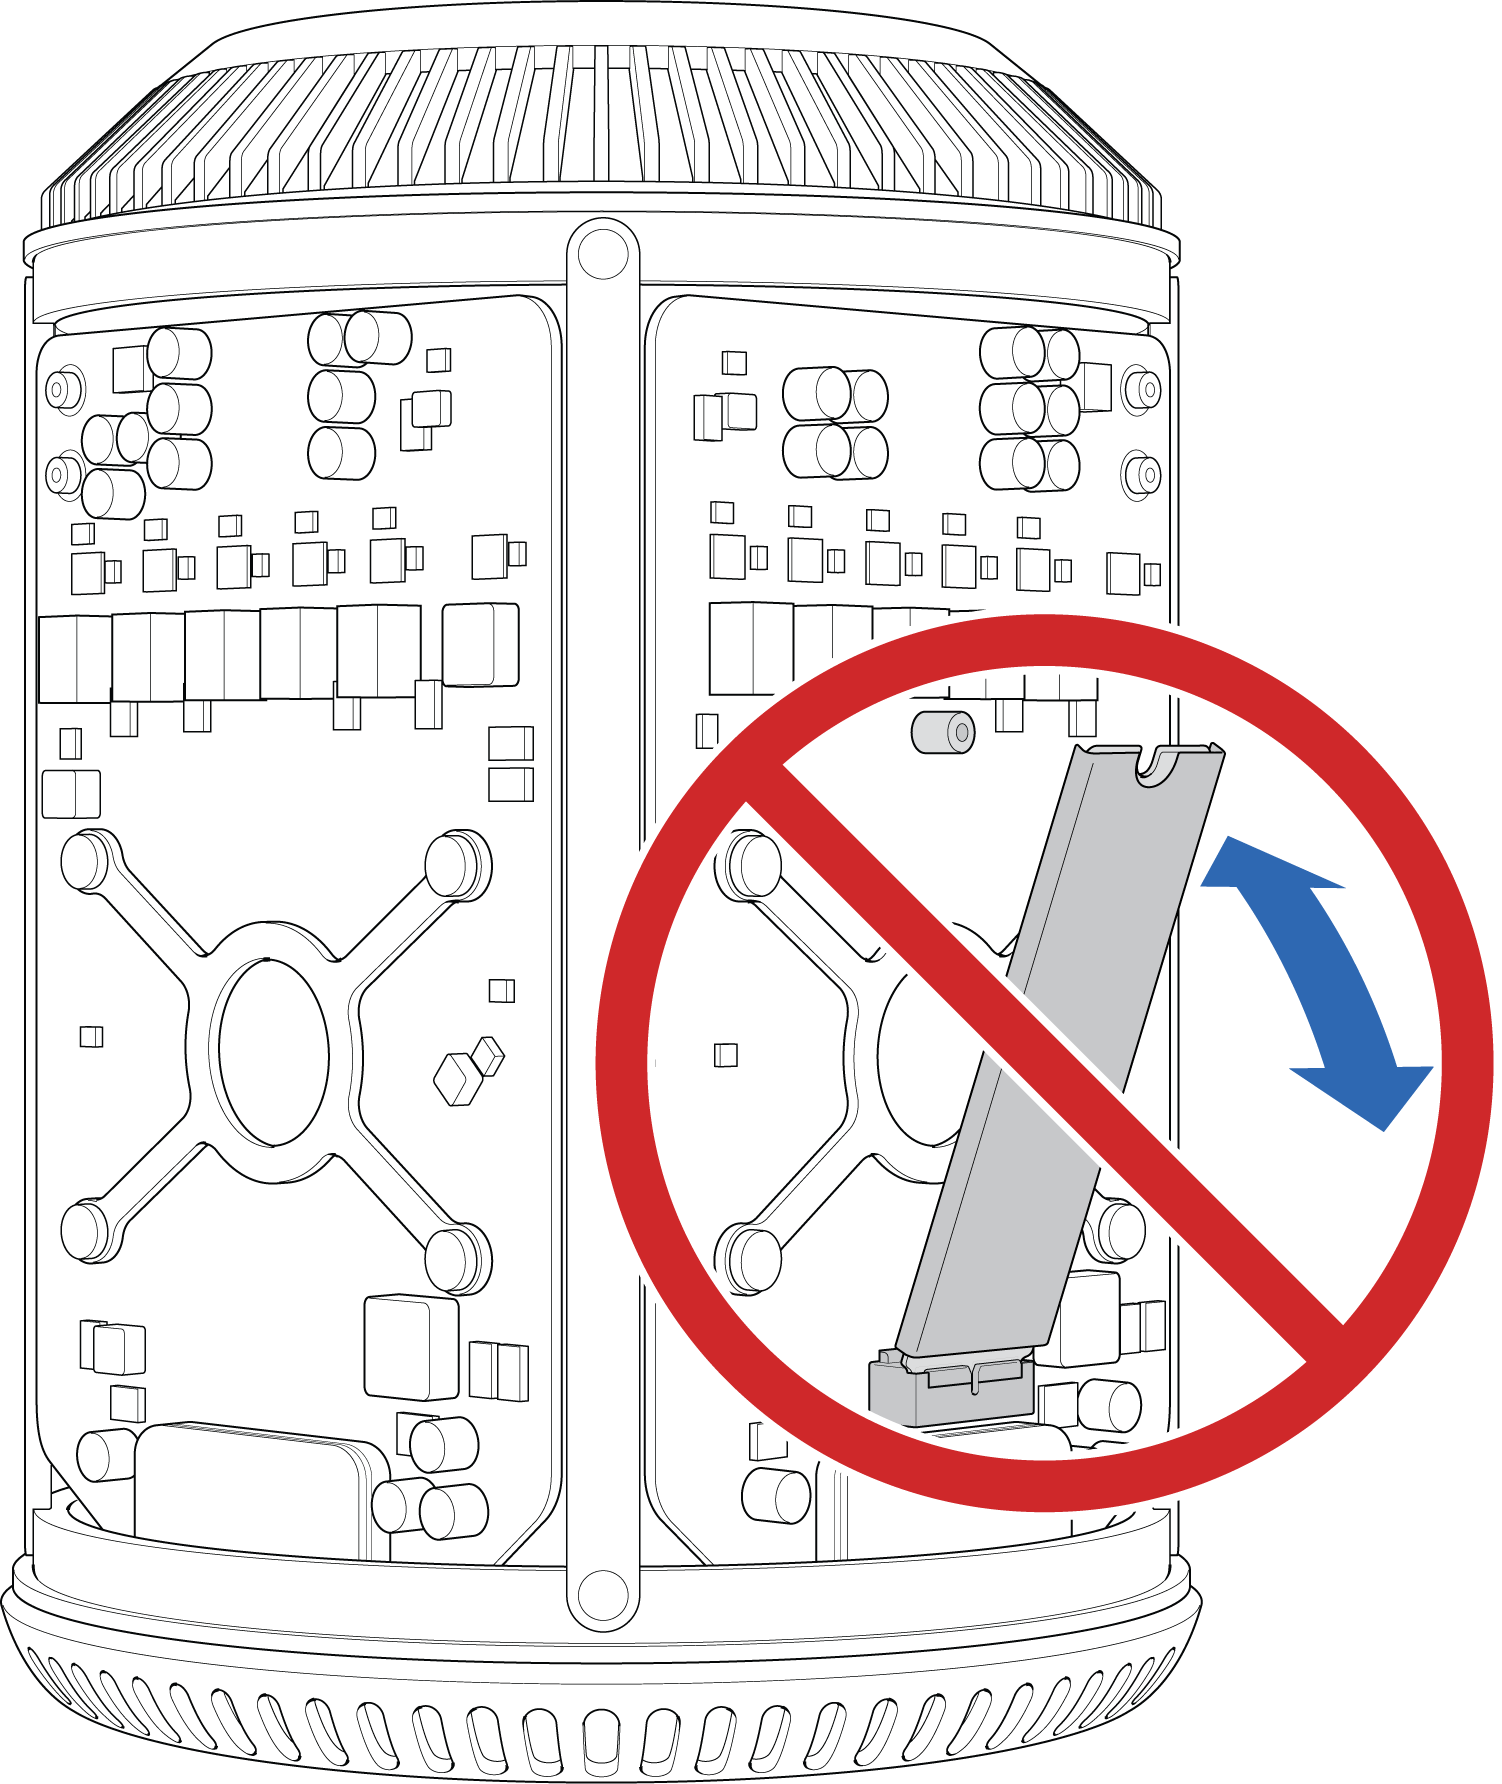
- With one hand, gently hold the sides of the flash storage device and gently lift it straight up to disengage it from the flash storage connector located at the bottom of the device.
- Once disengaged from the flash storage connector, pull the flash storage device away from the graphics board and place it into an electro-static discharge (ESD) protective bag.
- DO NOT pull the flash storage device away from the graphics board until it has completely disengaged from the flash storage connector or you may damage the connector.
Part 3: Installing flash memory
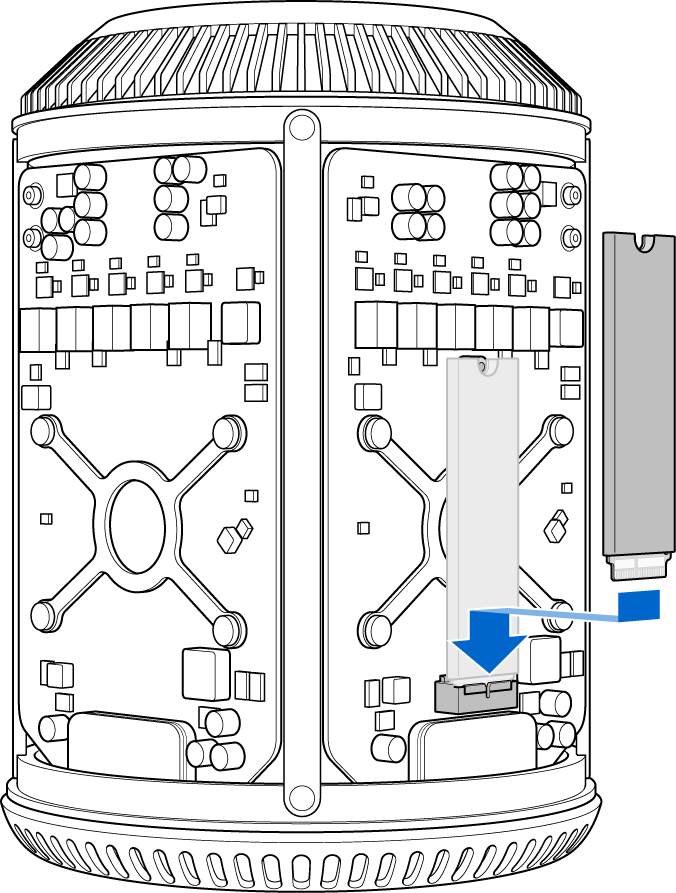
- Before reinstalling the replacement flash storage, carefully inspect the connector. The flash storage is keyed with a thin slot that connects with the flash storage connector to prevent incorrect installation.
- Orient the flash storage so that it will connect with the flash storage connector.
- While holding the flash storage parallel to the graphics board, place the flash storage contacts into the graphics board flash storage connector.
- Gently push down until it is fully seated. Do not force the flash storage device into position. If the flash storage device doesn't appear to fit, verify that you are using a compatible device, and that the key on the flash storage device is oriented correctly to connect with the flash storage connector on the graphics board.
- With the flash storage device in place, carefully install the T8 screw that you removed earlier. Do not let the screwdriver make contact with other areas of the graphics board or damage may result.

Part 4: Reinstall the enclosure
- Carefully lower the enclosure over the Mac Pro being careful not to touch any of the circuit boards.
- You may need to gently push down on the enclosure in order for it to seat fully.
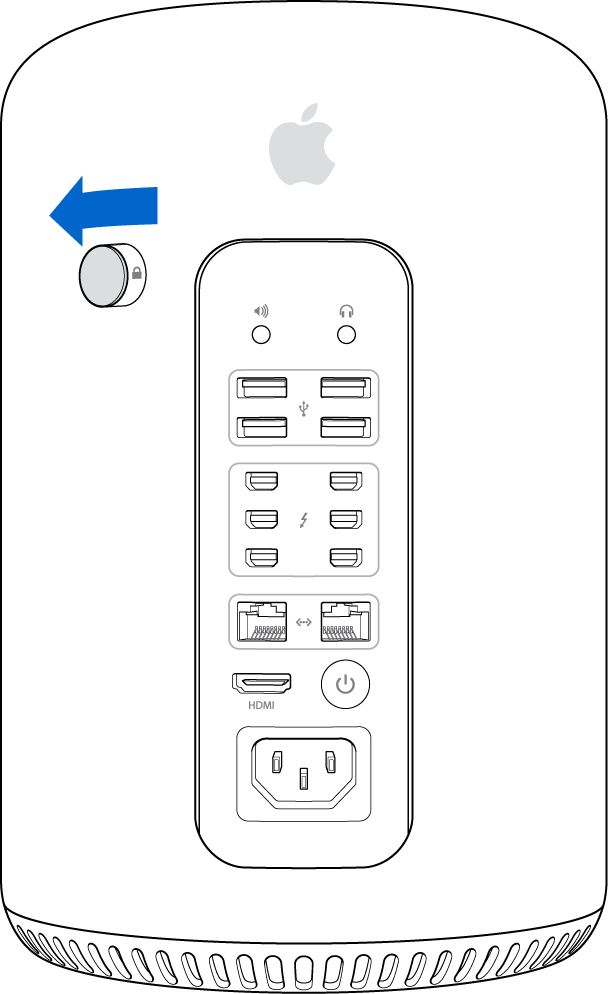
- Once the enclosure is fully seated, slide the enclosure latch to the left to lock it.
- If the enclosure latch does not move all of the way to the left, verify that the enclosure is properly installed and fully seated, then try again.
- You are now ready to connect a power cord, display, and other peripherals.
- If the drive isn't already formatted with a file system or doesn't have a bootable operating system, start up in Internet Recovery mode by holding down the Command, Option, and R keys. Once started, you can format and reinstall OS X or restore data using a Time Machine backup if you have one available.
Last Modified: Dec 20, 2013
 Twitter
 Facebook
Start a Discussion
in Apple Support Communities
