OS X: Using multiple displays in Mavericks
Get the most from your displays
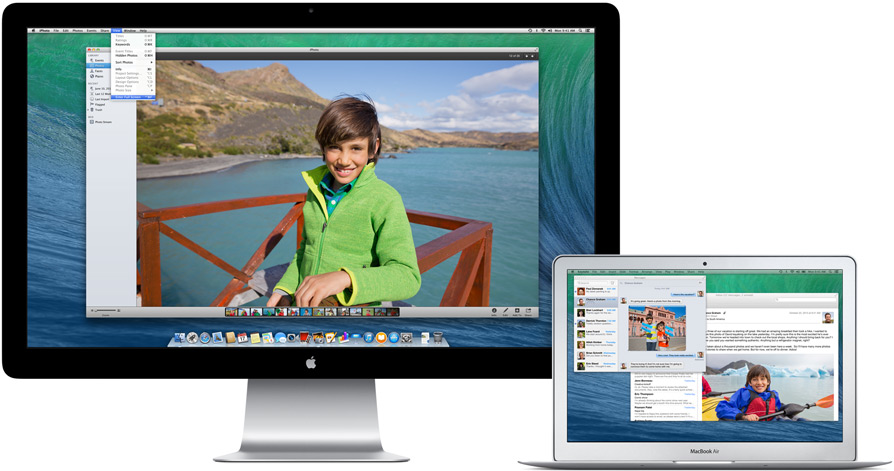
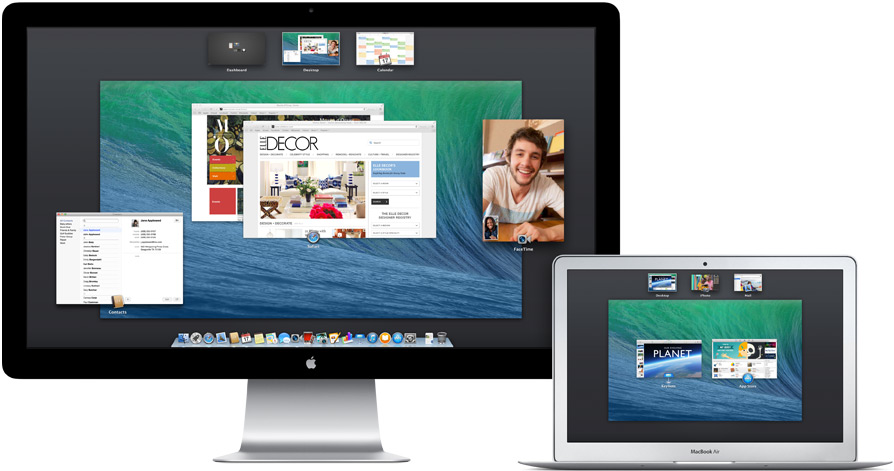
With an external display connected to your Mac, you can work the way you want. Each display has its own menu bar, and apps can run in full screen mode on each display. Want to use your HDTV as another display? You can easily do that with AirPlay and an Apple TV.
Each display connected to your Mac can have its own windows and full-screen apps. You can spread out your work however you like.
Move your pointer to the edge of the screen to move it to the next display.
Apple TV
With AirPlay and Apple TV, your HDTV works as a fully-functional display. You can move windows or entire spaces to your TV, or even mirror your computer's display.
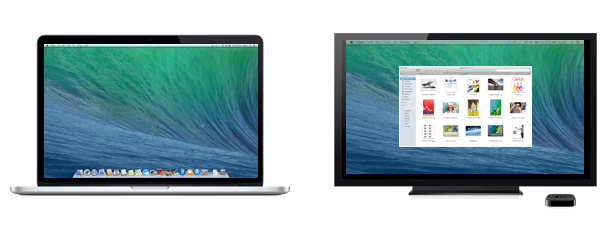
See About AirPlay Mirroring in OS X Mountain Lion and Mavericks for more information on how to set up your HDTV as an external display using Apple TV.
Full screen applications
With Mavericks, you can use full screen apps on each display independently. Open an app full screen on one display. On your other display, open an additional app as either windowed, or full screen.
To switch between full screen apps, move your pointer over to the app and click. You can also use Mission Control or press Command-Tab to change your focus.
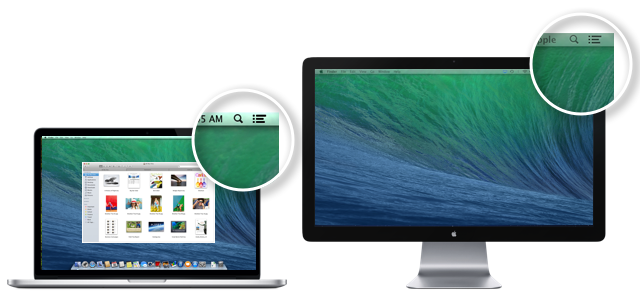
Working with the menu bar
Mavericks shows a menu bar on every screen. The menu bar on each display changes depending on which application your are working in. Click a window belonging to the app, select the app icon in the Dock, or press Command-Tab to switch between applications.
Working with the Dock
When the Dock is configured to appear at the bottom of your screen, it's available on whichever screen you’re working on. Just move your pointer to the bottom of either display. When the Dock is configured for the left or right position, it appears on the leftmost or rightmost display edge.
Tip: If you don't see your dock because it's set to hidden or there's a full screen app on the display, move your pointer to the location of the Dock. If the Dock still doesn't appear, swipe your pointer towards the Dock again to unhide it.
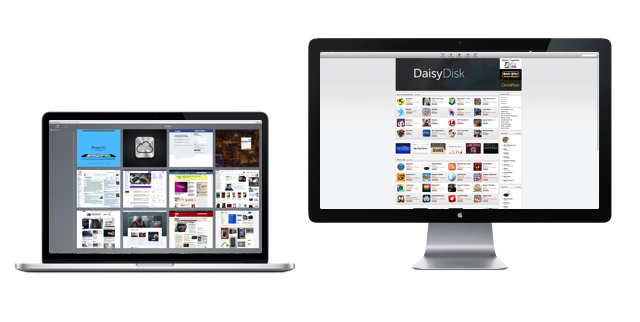
Using Mission Control to organize windows and full-screen apps
App windows are assigned to a single space. You can use Mission Control to see all of the Spaces assigned to each display and to move them. To move a Space, drag it from one display to the other.
Windows in Mavericks reside in a single space by default, so they usually don't span multiple displays. When a window is dragged between displays, it appears transluscent on one of the displays to indicate this. After you are done dragging the window, it snaps to one display.
If you need an app window to span multiple displays, deselect the option "Displays have separate Spaces" in the Mission Control pane of System Preferences.

You can also assign an app to a specific display space from the app's menu in the Dock. Windows assigned to a space always open there when the display you specified is connected.

More
To learn more about using multiple displays with OS X, select a topic from the list below.
Arranging your displays
To help you navigate your pointer and windows, you can tell OS X where the displays are in physical relation to each other. When you move your pointer past the edge of one screen, it appears on the adjacent display.
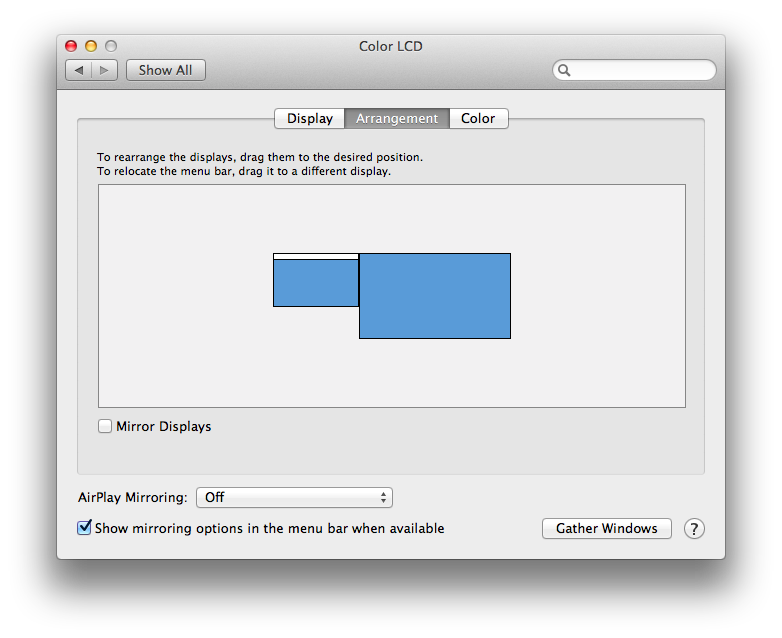
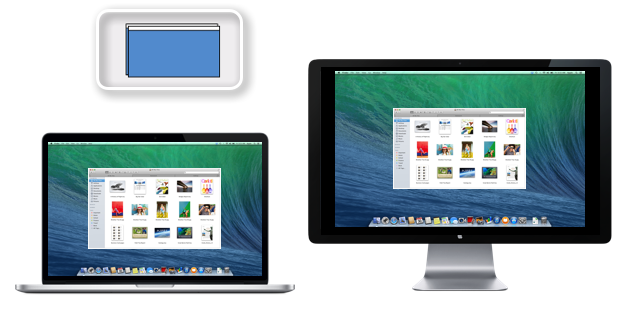
The blue boxes in Displays preferences represent each display that's connected. The size of each box is relative to the current resolution of each display. In this example, the smaller box on the left is the display of a 13" MacBook Pro while the larger box on the right represents the Apple 27" Thunderbolt Display.
Drag any of the blue boxes to change the location of a display in relation to your additional screens. You can use this feature to make sure your connected displays match their real world location when navigating windows. The white bar at the top of the blue box represents the menu bar. Drag the white bar onto the blue box representing the display you want as your primary display.
![]() Video Mirroring
Video Mirroring
Video mirroring simultaneously shows the same image on multiple displays. Use these steps to make one display show the exact same images and windows as the other display.
- Make sure your additional display is properly connected and powered on.
- From the Apple () menu, choose System Preferences.
- From the View menu, choose Displays.
- Click the Arrangement tab.
- Enable (check) "Mirror Displays" in the bottom-left corner of the Arrangement pane.
Tip: Select "Show mirroring options in the menu bar when available" to add a shortcut menu to the top of your screen. This menu (
 ) is a quick way to select an Apple TV or Television to use as a display. The menu appears when an HDTV is connected to your Mac, or when an AppleTV is available on your network.
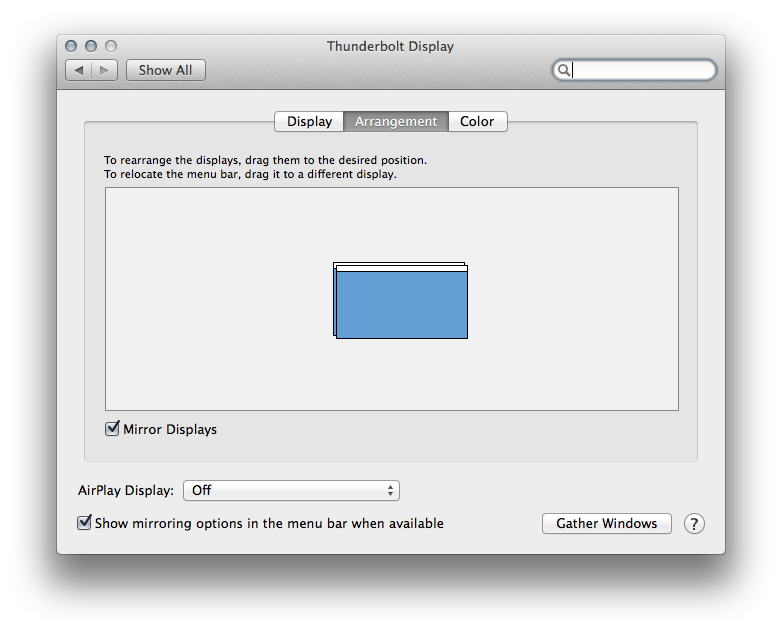
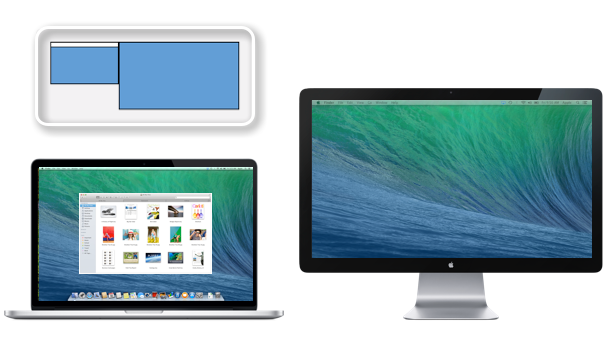
The blue boxes represent each display that is connected. The white bar at the top of both boxes represents your menu bar. It is shown on both displays because they are showing the same information.
Note: When using video mirroring, you may see black bars on the sides of the screen image if the dimensions of both of your displays aren't the same.
Closed lid mode
You can also connect a display to a notebook Mac when its lid is closed.
To work in closed lid mode, you need to you connect your Mac to AC power, and use an external keyboard, mouse, or trackpad. If you don't connect your power adapter to the computer, it may not wake from sleep when an external display is connected and the lid is closed.
For more information on using external displays with a notebook computer that has its lid closed, see Mac notebooks: How to use your computer in closed clamshell (display closed) mode with an external display.
Additional Information
- For additional information about using external displays, see Apple computers: Troubleshooting issues with video on internal or external displays.
- For information about using your Mac as a display in Target Display Mode, see Target Display Mode: Frequently Asked Questions (FAQ)
- Quick key commands for video controls:
- Press Command-F1 to toggle between video mirroring and extended desktop
- Press Command-F2 to detect displays